Thursday, October 15, 2015

Angel Food Cupcakes with Devil Frosting

There have been a lot of muffins up in here. Time to mix it up! My coworker returned from maternity leave last week and we're super excited to have her back so decorated her office and wanted to bring in her favorite treats. So naturally, none of us were certain what her favorite treat was so we asked her husband (because yes, we have his number too).

The choices given were angel food cake with dark chocolate frosting, strawberry shortcake or creme brulee. Needless to say, angel food cake was the winner. Especially since I don't own a torch nor do I think I should try to improvise that. Although I did find some strawberry shortcake cookie recipes. But alas, fluffy cupcakes it is!

I tried making angel food cake once before and while it tasted great, the consistency was a little dense. This was in part due to the difficulty I had getting the cake out of the ungreased pan. But since that was the main pitfall, I decided cupcakes would be safe in their individually wrapped-ness.

Otherwise, I followed the instructions to a t. Lots of egg whites? Check. Process my refined sugar? No problem. Cake flour? Okay, I did some Googling to see if I actually needed cake flour. Yes, you need cake flour to make this a light texture. Somethin' somethin' about the protein content.

Egg whites are beaten before mixing the sugar in and forming medium peaks. I prefer to call these mild peaks because what is medium? Mild just means we're part-way there. Medium speed. As the dry ingredients are slowly added, the batter is growing. Like actually expanding. Ultimately, you want it to hold its own shape so if you drag a spoon through it, you are parting the batter sea and it's not filling up the divet you just made.

I used an ice cream scoop to spoon the batter into the cupcake tin. The batter keeps its shape in the bowl and I filled the liners up almost to the top so I had some space for the frosting later. These cupcakes will get fluffy but don't expand much. In fact, the wrappers actually shrink to the cake so they're super easy to get out of the pan.

I made the cupcakes ahead of time, saved them for a day and then frosted them with a dark chocolate ganache just before serving. The ganache is straight up cream and dark chocolate, melted together to perfection. Yes, you can also eat it straight.

So with the fluffiness of angel food and the decadence of the dark chocolate, I think these two elements cancel each other out. Does that make them Earth cupcakes? Let's just stick with delicious.


Recipe
Cupcakes
  • 3/4 cup + 2 Tablespoons granulated sugar
  • 1/2 cup cake flour
  • 1/4 teaspoon salt
  • 6 egg whites, at room temperature 
  • 2 1/2 Tablespoons warm water
  • 1/2 teaspoon vanilla extract
  • 3/4 teaspoon cream of tartar
  1. Preheat the oven to 350 and line a cupcake pan with liners.
  2. In a food processor, pulse the sugar until very fine.
  3. In a small bowl, combine half of the sugar with all of the cake flour and salt.
  4. In a large bowl, combine the egg whites, water, vanilla extract and cream of tartar. Whisk together until combined.
  5. Switching to a hand mixer, beat the egg mixture while adding the reserved half of the sugar. Continue mixing until medium (mild) peaks form.
  6. Set aside the hand mixer and dust the egg mixture with the flour mix, folding in with a rubber spatula. Repeat until all of the flour mixture has been incorporated. 
  7. Scoop the batter into the prepared pan and bake for about 20 minutes or until golden brown.
  8. Allow to cool completely before frosting.
Frosting
  • 1/2 cup heavy cream
  • 3/4 cup dark chocolate chips
  1. In heat proof bowl or double boiler, combine the cream and chocolate set over a pan of water.
  2. Heat the water and stir the cream and chocolate until it begins to melt together
  3. If your mix comes out too liquidy, add more chocolate. If it's too thick, add more cream. 
  4. Once the mixture is completely combined, remove from heat.
  5. Allow to cool before frosting the cupcakes.

Monday, October 12, 2015

Maple Walnut Muffins

I had every intention of taking a step back from fall things and making banana muffins. The bananas, however, had other plans. I really thought I could just freeze the bananas and then thaw them and they'd be okay. Falsehoods. They got really syrupy and rotten and gross. Plan B: maple walnut muffins. Much more seasonally appropriate and not squishy.

People wonder why I bake all the time or how I find the time and honestly, it's hard sometimes to carve out time so I'm not rushing through a recipe. But I find baking very cathartic. I can just listen to music and mix together ingredients, making a creamy batter that will become a delicious muffin or donuts or cake. And then I get to relax and listen to music while everything's in the oven, it's like 'me time'. Not that I really need to carve out me time, my life is basically my time at this point.

 
 These muffins were a little more intensive because they have a topping. I opted out of the suggested icing though. I know that muffins are really just cupcakes that are acceptable for breakfast but the topping seemed sufficient. I do have a pretty difficult time making the topping crumbly enough but if you too have this struggle, just make sure you have a chunk of butter in there and it will melt and cook up just right.

 
I typically try to position my baked goods with some healthy twist like telling my coworkers that there's Greek yogurt in there or not that much butter etc. I pretend that will make people eat them up faster. Recently, one of them pointed out that they would eat them regardless of how healthy I try to make them sound. But these muffins have oats! And they have Greek yogurt! And really the only butter is in the topping! Look at all the healthy things! Eat the muffins...

 
Recipe

Muffins
  • 1 3/4 cup of flour
  • 1 cup rolled oats, run through a food processor
  • 3 teaspoons baking powder
  • 1/2 teaspoon cinnamon
  • 3/4 cup packed brown sugar
  • 2 large eggs
  • 1 cup of milk
  • 1/3 cup vegetable oil
  • 1/4 cup Greek yogurt
  • 1 Tablespoon maple syrup (or extract, if you have it)
  • 1 cup walnut pieces
  1. Preheat oven to 400 degrees and line a muffin tin with liners (or spray with non-stick).
  2. In a medium bowl, combine the flours, processed oats, baking powder and cinnamon.
  3. In a large bowl, whisk together the sugar, eggs, milk, oil, yogurt and maple syrup.
  4. Stir in the dry ingredients in with the eggs mixture.
  5. Fold in the walnuts.
  6. Fill each muffin liner 3/4 full and top with the topping. 
  7. Bake for 30 minutes or until cooked through.
Topping
  • 2 Tablespoons cold butter
  • 1/4 cup brown sugar
  • 2 Tablespoons flour
  • 2 Tablespoons rolled oats
  1. In a small bowl, combine the sugar, flour and oats.
  2. Cut in the cold butter with a knife or pastry cutter.
  3. Sprinkle on top of muffin batter in the pan. 

Monday, October 5, 2015

Pumpkin Muffins

We are taking this fall situation head on. I personally would like a giant pile of leaves to jump into. Kthnx.

While pumpkin spice lattes (and everything else) have been around for a few weeks now, I hadn't cracked open a can of pumpkin until this past week. And it's gonna be all downhill pumpkin from here! This recipe only required half a can of pumpkin, so I used the other half to make some pumpkin chili (pardon the ancient and terrible photos that went with this post, I was young).

Muffin Mondays are gaining popularity at the office so after last week's zucchini muffins, I took a poll on just how ready for fall people were. Would they prefer banana (no fall for me, please), apple (okay, I know, we're getting there) or pumpkin (wooo!! It's fall!!!!!)? The resounding winner was pumpkin. I also made these during the blood-moon eclipse so maybe they should be called Lunar Muffins...

For good measure, I threw some chocolate chips into half the batch because chocolate chip pumpkin anything is a great idea. Cookies, bread, muffins, you get the idea. We do the thing where we separate our dry and wet ingredients. I used the spices that smell like fall baking. No joke, I woke up the other morning smelling apple pie in the oven. It was a lie but it stuck with me.

I love the color of pumpkin, the burnt orange of the filling makes me feel all the warm fuzzies. The flour mixture is slowly poured into the wet ingredients and stirred gently until everything is combined. I like that for muffins, I can just use a good old fashioned wooden spoon and don't have to use a hand mixer. It helps that the butter was melted for this recipe.

I think there's some serious potential for cupcake liner companies to make a liner that has a 'fill here' line. Sometimes you get too much and they overflow (not a bad thing, necessarily) or you put too little and then you have a sunken cupcake/muffin. I know the expansion rates of the batter will vary by recipe but ya know, ball park estimate.

At any rate, I filled these about 3/4 of the way full and baked for 30 minutes or so. While the first batch baked, I sprinkled chocolate chips into the remaining batter. Great plan. All in all, there were 18 muffins out of all of this.

Let's keep the trend alive, more muffins next week!

Recipe
From Joy of Cooking

  • 2 cups all-purpose flour
  • 1 Tablespoon baking powder
  • 1/2 teaspoon salt
  • 1 teaspoon nutmeg
  • 1 teaspoon cinnamon
  • 2 eggs
  • 1 cup milk
  • 1 cup pumpkin puree 
  • 1 cup brown sugar
  • 1 stick unsalted butter, melted
  • 1 teaspoon vanilla
  • Sprinkling of chocolate chips
  1. Preheat the oven to 400 and line a muffin tin with liners (or spray with non-stick spray)
  2. In a medium bowl, combine the dry ingredients (flour, baking powder, salt, nutmeg, maybe some cinnamon if you'd like).
  3. In a large bowl, whisk together the sugar, eggs, milk, vanilla, pumpkin and melted butter. 
  4. Once the wet ingredients are thoroughly combined, pour the dry ingredients into the wet while stirring gently.
  5. Using a wooden spoon (or other stirring utensil), stir the wet and dry ingredients together until fully combined.
  6. If you'd like, add the chocolate chips (or nuts) and fold into the batter.
  7. Pour the batter into the muffin liners, filling 3/4 of the way full.
  8. Bake for 30  minutes or until firm. 

Monday, September 28, 2015

Chocolate Zucchini Muffins

I missed the part where it was September. Yes, I've had my pumpkin spice latte. Yes, I've pulled out the sweaters. Yes, I noticed it's getting darker way earlier which makes me sad. But somehow, I woke up and realized it's almost October--OCTOBER?!?! I've got a stockpile of apple and pumpkin all ready to go but I can't quite commit to October treats just yet. Maybe next week.

To bridge the gap, I brought back Muffin Monday at work. Zucchini is still the love my summer life and I've made oodles of zoodles (mostly so I can say "oodles of zoodles" more often). When I was in Maine a couple weeks ago, my mom and I made a double batch of zucchini bread (so much zucchini bread). My mom usually makes it chocolate zucchini bread but this time, we did a nice half and half of regular and chocolate loaves.

Inspired by this epic baking session, I created these chocolate zucchini muffins as a way to have a healthy breakfast on the go. Instead of oil, we're using Greek yogurt. I also solidly believe the yogurt gives a better texture to breads and muffins. For good measure, we're also adding pecans--because we [pe]can! You know you love the puns.

 
A large zucchini is shredded onto a double layer of paper towels. You need to squeeze out that extra water from the vegetable before we make it into muffins. One bowl contains our zucchini, another contains our dry ingredients while the biggest bowl has the wet ingredients. Eggs, sugar and yogurt are whisked together before stirring in the dry ingredients. When I started this process, I wasn't going to make them chocolate so I added the cocoa powder after the fact. It worked out in the end.

 
Zucchini and pecans are added last, gently folded in to make sure you get a good bit in every bite. I baked these for about 30 minutes. Of course I ate one right away but without oil, they stick to the wrappers a bit until they are cooled. Tastes the same but you get less muffin for your buck until you let them set.

 
So what will Muffin Monday be next week, pumpkin? Apple? Banana? Decisions, decisions...

Recipe
adapted from Joy of Cooking
  • 1 1/2 cups of flour
  • 1/4 cup of unsweetened cocoa powder
  • 1 teaspoon baking soda
  • 1 teaspoon baking powder
  • 1/4 teaspoon cinnamon
  • 3/4 cup sugar
  • 2 eggs
  • 1/2 cup Greek yogurt
  • 1 teaspoon vanilla
  • 1/2 teaspoon salt
  • 2 cups grated zucchini, drained of excess liquid
  • 1/4 chopped pecans (optional)
  1. Preheat the oven to 350. Line a muffin tin with paper liners or grease with cooking spray.
  2. In a medium bowl, mix together the dry ingredients: flour, cocoa powder, baking soda, baking powder and cinnamon.
  3. In a large bowl, whisk the sugar, eggs, yogurt, vanilla and salt until creamy.
  4. Slowly stir the flour mixture into the egg-sugar mixture until incorporated.
  5. Fold in the zucchini and pecans (if desired) until evenly mixed.
  6. Fill muffin tins 3/4 of the way with batter.
  7. Bake for 30-40 minutes or until a toothpick placed in the center comes out clean. 
  8. Allow to cool before eating. 

Friday, September 4, 2015

Oatmeal S'mores Bars

If for some reason melted chocolate and marshmallows don't appeal to you, stick with this post anyways just for the life hack included. That's right, we're life-hacking butter, very important. Summer isn't complete without a s'more...or three. I successfully did the fire-building (okay, my brother did the fire building) and the marshmallow roasting and melty chocolate making.

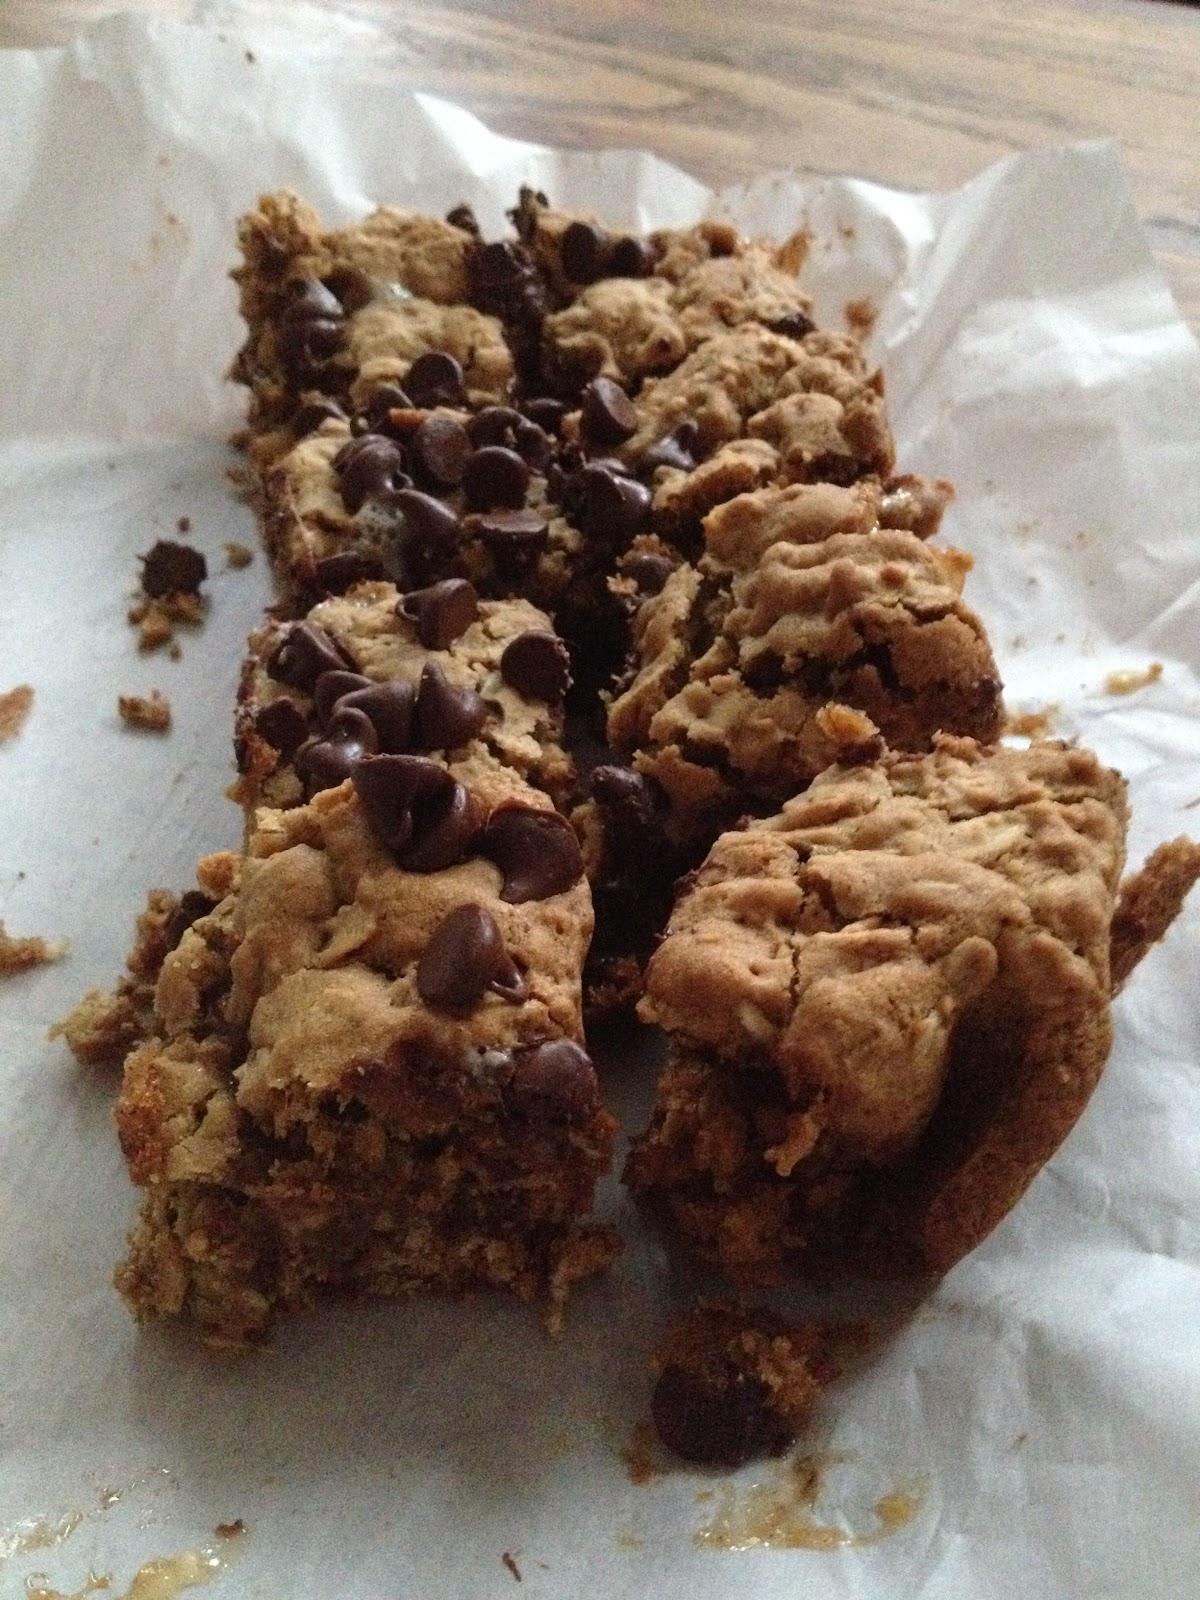
I know you could technically roast marshmallows over a gas stove flame but you could also make these s'mores bars to capture the camp roasting goodness in the city. Or your home. Or in the winter. For-e-ver. These are basically chocolate chip oatmeal cookies with marshmallows in a bar. Totally acceptable for breakfast.


Are you ready for the life hack? I never remember to take butter out to soften. This means I stick it in the microwave and melt the stick instead. It works, clearly, but it's not the best way to get creamy butter and sugar base. So instead, I saw this video on how to quickly soften your butter while also taking out some aggression. Use a rolling pin and smoosh the butter! And by smoosh, I mean whack. It doesn't make the butter ooze everywhere, you could put it in a bag if you're concerned, but I rotated the stick as I hit the butter so it didn't get completely flat and evenly softened. Success!

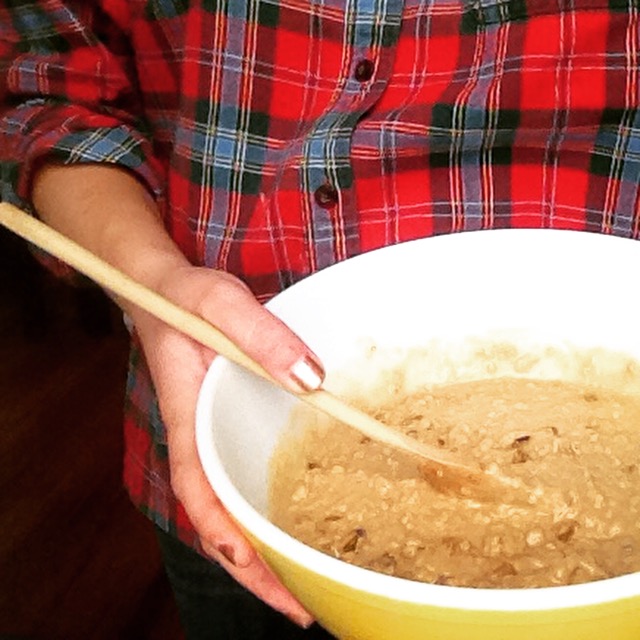
Once you have your butter ready, cream it with the sugars using a hand mixer. The dry ingredients (excluding oats) are mixed in a separate bowl and then added to the sugar-butter goodness. It's gettin' thick! Once the dry and wet ingredients are well incorporated, fold in the oats. This is where your biceps go to work.

In a square pan, dump half of the oats mixture and flatten. Next, add a layer of chocolate chips. Be generous! Then, add a layer of marshmallows.

The second half of the oats mixture goes on top of the chocolate and mallow layer. This makes icing a cake look so darn easy. I found it easiest to just throw down a blob of batter and flatten rather than try and spread it. Top with another layer of chocolate, because we can.

Bake for awhile. Okay, not forever, just until everything is cooked through. It's hard to tell because this is so dense but use a chopstick to test the middle.

I let these cool and set overnight before trying to slice and share, the gooey warm marshmallow could get messy but oh so delicious. Like I said, completely acceptable for breakfast.

Recipe
from Spoon Fork Bacon

  • 1 2/3 cups of flour
  • 1 teaspoon baking powder
  • 1/2 teaspoon salt
  • 1/2 teaspoon cinnamon
  • 1/4 teaspoon nutmeg
  • 1 stick unsalted butter, softened (or beaten with a rolling pin)
  • 1 cup brown sugar
  • 1/4 cup granulated sugar
  • 2 eggs
  • 1 teaspoon vanilla extract
  • 2 1/2 cups oats
  • 8 ounces of chocolate, divided
  • 6 ounces mini marshmallows (okay, I didn't measure this)
  1. Preheat your oven to 350 degrees. Line an 8x8 pan with parchment paper and set aside.
  2. In a small bowl, whisk together the flour, baking powder, salt, cinnamon and nutmeg. Set aside.
  3. In a medium bowl, cream the butter and sugars together until they are smooth. Add the eggs one at a time. Top off with the vanilla.
  4. Add the flour mixture to the butter mixture a little at a time, mixing with an electric mixer on low. This will prevent a dust storm.
  5. Fold in the oats using a rubber spatula.
  6. Press half of the oats mixture into the square pan. Use the rubber spatula to press it into the pan to fill the square shape.
  7. Top with a layer of chocolate chips (I didn't measure this either). Add your layer of marshmallows.
  8. The next part is tricky. Add the remaining oat mixture to the pan. I found this was best achieved by taking a spatula-full at a time and pressing it on top of the marshmallow layer instead of trying to spread it. 
  9. Once that's done, top with another layer of chocolate chips.
  10. Bake for 30 minutes or until firm. Allow to cool before cutting and serving. Totally a breakfast food.