Friday, February 27, 2015

Cherry Scones

I've done a lot of cleaning in the last month. Not so much making things clean (although I did take some cotton swabs to my waffle maker to get it clean again) but to get rid of the excess stuff I've accumulated. Like a hermit crab, I fill the space I have. And now, I'm about to have slightly less space and less of an inclination to move things I don't really need. A few trunk fulls of donated stuff later and I still feel like I have too much stuff.

So I've moved on to purging the pantry. It's good to get rid of those one time useful ingredients that are probably not so good anymore (and clearly not worth the investment) and results in delicious items. By now, my kitchen tools are all packed up so I'm using my roommate's which are mostly brand new but still unfamiliar.

Based on the ingredients in my fridge and pantry, I slightly modified this raisin scone recipe to be cherry scones instead. Craisins, raisins, same difference! Scones have always been a challenge for me because I'm not a cold butter person. My favorite recipes are when the butter needs to just melt so I don't even have to try and make it soft or room temperature (aka: melt it in the microwave). But the cold butter is key so I carried on. 

This simple recipe requires mixing the dry ingredients together with the cold butter cubes. Then, an egg and plain yogurt are mixed together and added to the dry ingredients. The dough gets a bit sticky, I ultimately just dug in there with my hands and folded in the dried fruit. 

I was under the impression that scones don't rise or spread so I made some giant scones and placed them close together. FYI, they do expand a little. I don't have a pastry brush at the moment so I used a fork and my fingers to spread some egg on top of each scone. This part greatly concerned me because I thought I would end up with scrambled eggs cooked on top of my scone. Granted, I ended up with some scrambled eggs on the pan where the egg had run off the scone but all in all, the egg is also an important factor in keeping the scones together and fresh. 

Mission accomplished: flour is depleted. The other thing about baking and moving is not many blog photos were taken, oops! These are definitely best hot but breakfast the next day is still an option! Store in an airtight container and share with coworkers, friends and family alike.

Recipe
  • 3 cups all-purpose flour
  • 2 teaspoons baking powder
  • 2 teaspoons baking soda
  • 1/2 teaspoon salt
  • 2 Tablespoons brown sugar
  • 6 Tablespoons cold butter, cubed
  • 1 1/4 cup plain yogurt
  • 2 eggs, used separately
  • 3/4 cup dried cherries (or cranberries or blueberries or chocolate...)
  1. Preheat the oven to 400. Line a large baking sheet with parchment paper and set aside.
  2. Combine the flour, baking powder, baking soda and salt in a medium bowl. Whisk together and then cut in the brown sugar and cold butter.
  3. In a separate bowl, whisk together the yogurt and one egg. Pour the wet ingredients into the dry and stir to combine. You may need to use your hands to make sure everything mixes well.
  4. Lastly, fold in the fruit. 
  5. Dish out circles of dough onto the parchment paper. These can vary in size, depending on how many you want to make.
  6. Whisk the second egg and using a pastry brush (or your fingers), glaze each scone with the egg. 
  7. Allow to bake for 15 minutes at which point they will be dense and delicious. 

Wednesday, February 18, 2015

From London, With Love

How do I begin a post from sunny London (no really, it's sunny)? Cheerio! Oy, you! Or plainly, I may never go home -- ever. Compared to the frozen tundra of Boston, London is in full blown spring mode. Apparently this is their winter but I'll take the occasional rain shower in exchange for the crisp air and sun.

 
When I told people I was excited for London and was taking a cooking class, most people wondered what good food there was in England since it's not exactly known for its culinary prowess. I will have you know that I have had quite the array of excellent food and wine whilst in London. Including, but not limited to, a variety of pie-like dishes, venison and general meat. And of course, a lot of dessert, wine and even, dessert wine!

 
The cooking class I took was specializing in fresh pasta. I've never made pasta and it worked well with our schedule to take this with L'Atelier des Chefs. I wish they had a location in Boston because this would be an amazing activity for girls night, team bonding, dates, cat lady night out, you name it! It only took an hour and although they pre-measured the ingredients, I have every faith that we can replicate this process in as little time as that.

Fresh pasta is not as difficult to make as I thought. Two simple ingredients, pasta flour and eggs, are combined and then you take out some serious frustrations on the dough. The chef made a lot of child disciplinary references when telling us to stretch our dough such as "it's like a child--you must be firm with it". Basically, you want to mix the dough together but then stretch and pound and stretch some more. You do this for about 10 minutes to activate the gluten in the dough and make it less sticky and more doughy.

 
The pasta dough is left to rest for 15 minutes or up to a day. This could save you some time if you're cooking for people, make the dough in the morning and then revisit later and closer to dinner. Meanwhile, you can prepare your sauce. In the class, we made a mushroom and truffle oil Alfredo sauce but really you can make any kind of sauce you want, perhaps even a Bolognese?


If you're making the mushroom sauce, chop up your garlic, shallots, mushrooms and thyme. I learned some pretty handy tricks for chopping/crushing garlic and chopping shallots. All the time saving! The sauce ingredients can be set aside while you cut up your pasta dough.

 
The dough we made was divided in half and still made a decent amount of pasta, probably enough for 4 people. The pasta noodles will expand when they cook so keep that in mind when dividing the proportions. You take half the dough and press it out into a rectangle. Then you feed it through the pasta machine. We were guided through this process but my guess would be you should follow the manufacturer's instructions. You're basically flattening and lengthening the dough, quite a bit, before cutting it into noodles.


Once you're ready with your noodles, you can move on over to the sauce pan. Butter is heated and melted over a medium-hot skillet before adding the thyme, garlic and shallots. Stir continuously to cook the garlic and shallots until they are slightly translucent. Next, you'll add a splash of white wine. Most of this cooks off but save the rest for pairing later! The mushrooms are also added and cooked until just the edges become translucent. Lastly, you'll add the cream to make it Alfredo. Allow it to cook on a lower heat while you make the pasta.

 
Fresh pasta cooks quickly so you make it last. Definitely salt the water since there's no salt in the pasta. The pasta is cooked for just about a minute to a slightly aldente (not fully cooked) texture. Then the past is added to the sauce and tossed to finish cooking and mix everything up.

We got all fancy with cleaning up our plating but this is best served in a slightly curved plate or bowl as the sauce could slide right off a flat plate.


Cheerio, then. Off to grab a pint or a gin beverage, whichever seems more British at the time.

Recipe courtesy of L'Atelier des Chefs for Fresh Pasta with Wild Mushroom Tagliatelli

Monday, February 9, 2015

Valentine's Day Chocolate Pretzels

Sometimes things are so simple and easy, they must be done. I'm not a huge fan of Valentine's Day but I do love chocolate and sweet and salty things (see 16, 17, 18 for card ideas for me). This treat is so easy, it's comical. So I wasn't sure if it was something suitable for the blog, who doesn't already know to melt chocolate, dip pretzels and consume in bulk for ultimate happiness?

What makes this interesting is the chocolate melting and the sprinkles. So basically the ingredients. I recently saw this article headlined about how to easily melt chocolate. As someone who has burned chocolate in the microwave many a time (I don't understand, sometimes it works!), I was excited to read about the secret.

 
This is a brilliant hack. We're bringing the hair dryer into the kitchen. And using it to melt chocolate. Brilliant! Especially since I'm about to be without a microwave for a couple months, I need all the melting hacks I can find.


The second ridiculous thing is the sprinkles. I've accumulated a fair number of festive sprinkles. So many, in fact, that I even know their different official names like crystals, nonpareils, jimmies, they're all in my brain space. And now they're all on their own row of my spice rack. I spent just a little too much time organizing my spice rack/Lazy Susan and removing spices that I would never use (such as Pizza Seasoning) to make room for my sprinkles. Among the Christmas crystals, Halloween nonpareils and birthday nonpareils are Valentine's confetti (no, I didn't put these in order by holiday....).


After blow-drying the chocolate to a nice warm mixture, pretzels are carefully dipped and then dabbled in the bowl of sprinkles. Laid to rest on wax paper, allow the chocolate to cool and set. If you're fancy, you can bag these up in festive treat bags and give out as a pseudo healthy gift. If you're like me, you can just go "one for you, three for me" or eat them all straight away.

However you decide to share these, remember to love yourself above someone else (unless it's your mom, definitely love your mom first).

Recipe
  • Desired number of pretzels (sticks, wands, traditional, whichever)
  • Semi-sweet chocolate morsels or baking chips
  • Festive sprinkles
  1. Using a hair dryer, microwave or double boiler, melt the chocolate in a heat proof bowl. Allow the chocolate to melt completely, stirring constantly until smooth. 
  2. Carefully dip the pretzels into the chocolate. Allow the excess chocolate to drip off before dipping in sprinkles.
  3. Lay the pretzels on a sheet of wax paper.
  4. Allow to set/dry/cool before bagging, serving or eating. 

Monday, February 2, 2015

Sweet Potato Soup

Sometimes when I sit and stair outside at the cold weather, I imagine different soups. Or to be more specific, I imagine different vegetables into soups. The standard tomato, carrot, butternut squash and even red pepper soups have been covered. I can't imagine that celery would make a good soup. Granted, I'm only considering the creamy soups and not things like chicken noodle. But what about sweet potato? They're good straight up, as fries, as casseroles, so why not soup?

Commence internet searches and voila! Sweet potato soup is in fact a thing. I realized after the fact that I neglected to add some things like spinach (consciously decided I didn't need to jam pack this with veggies) and coconut milk (that was completely accidental). I'm glad these forgetful episodes happen because it gets back to the whole reason I started this blog and that was to prove you can't go wrong even when you're wrong.

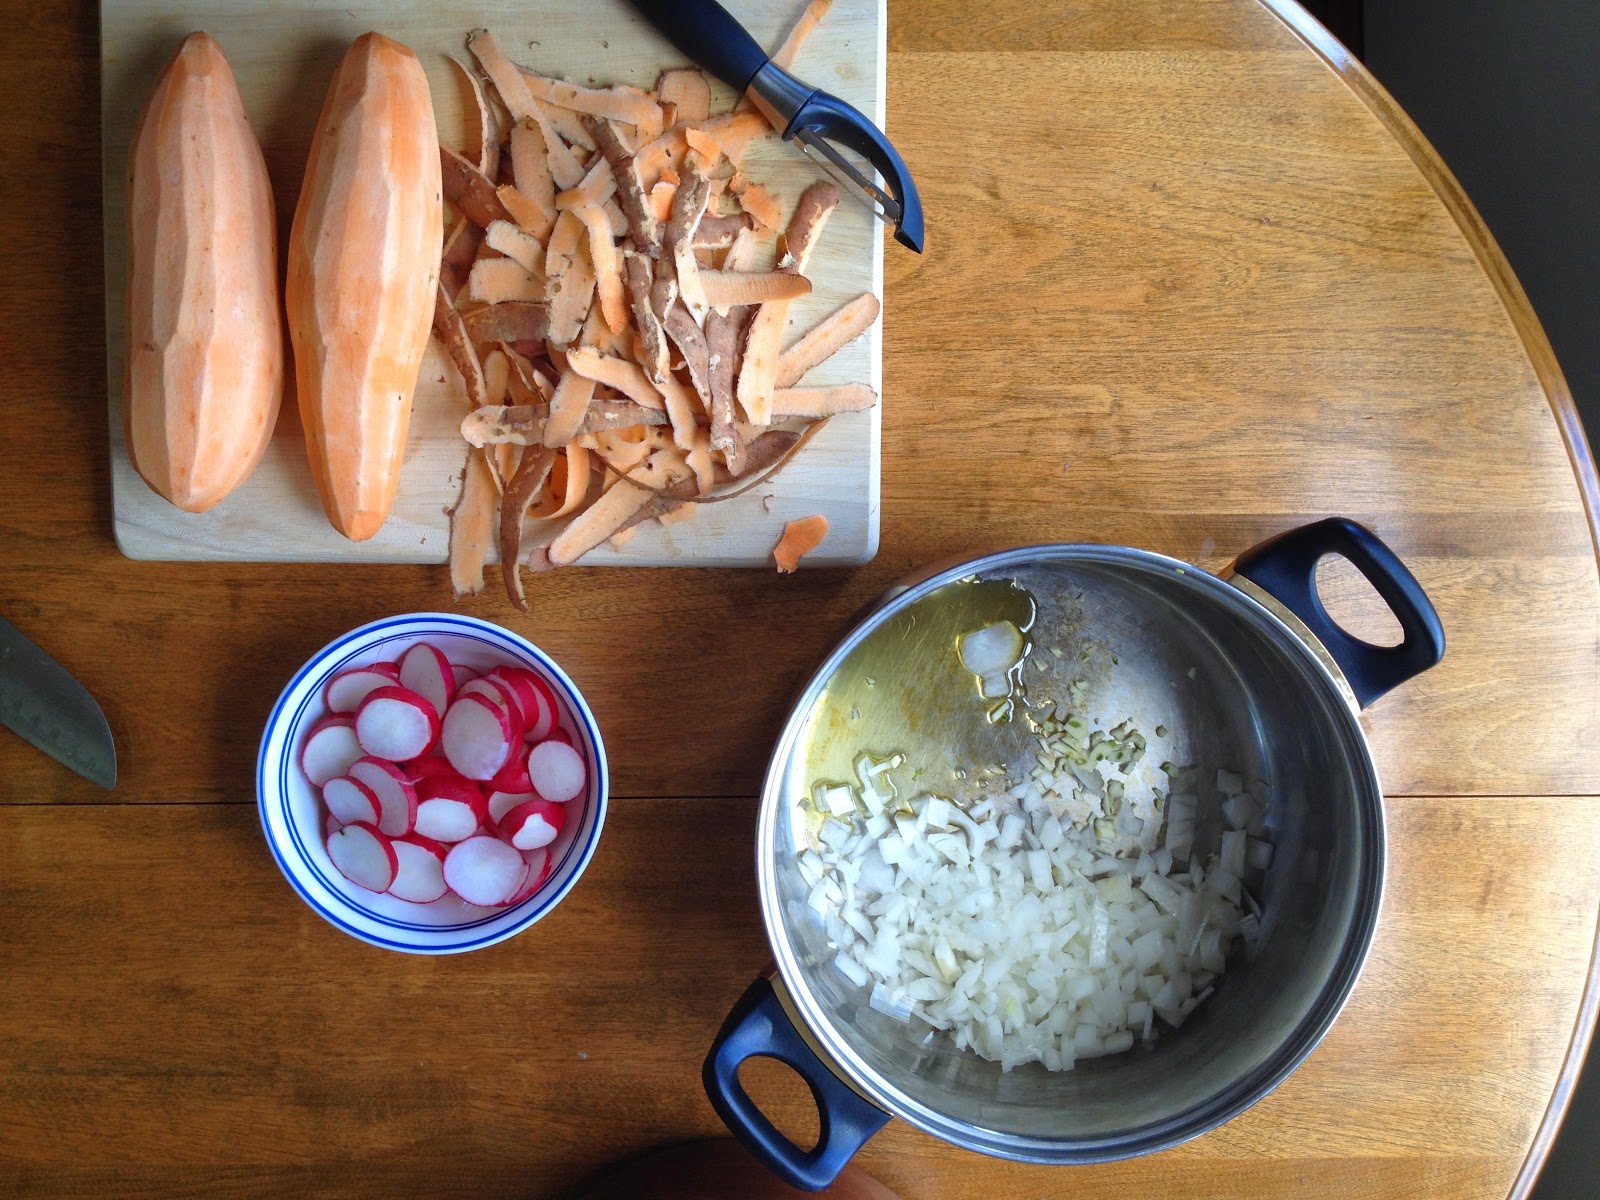
So for this recipe, we're using giant sweet potatoes, some earthy radishes, half an onion and curry for flavoring and topping it with sriracha sauce because why not? And it needed a little kick.

First things first: lots of chopping. A mandolin would be really useful when chopping radishes, they're quite small. I wondered what they tasted like the last time I used them (honestly can't remember what I was using them for) and they really don't taste like anything. So I guess I'll need to experiment with them more. The radishes, chopped onion, garlic and curry powder are combined in a pot with some olive oil over medium heat and cooked until the radishes become more translucent. You don't need to see all the way through them but they soften nicely.

Next, diced sweet potatoes are added and everything is covered in broth. Initially, this is where the recipe called for water and coconut milk but I decided broth was a better choice. Bring everything to a boil and then reduce to simmer. Once the sweet potatoes are soft, you can blend the life out of everything with an immersion blender (or carefully with a regular one). I usually end up using the pot lid as a shield from all the splatter but no surface is safe from the immersion blender.

Add a splash of sriracha sauce when you're ready to serve. Alternatively, you can add red pepper flakes or chili powder to the soup while it's cooking for an extra kick. As with all soups, consume in a delicious mug on a rainy day, curled up on a couch. Or in your office to warm up.


Recipe
  • 2 lbs. sweet potatoes, diced 
  • 1/2 onion, chopped
  • 2 cloves of garlic, chopped
  • 1 cup of radishes, sliced
  • 1 1/2 teaspoons curry powder
  • Sprinkling of black pepper
  • 1 Tablespoon olive oil
  • One box of broth (enough to cover everything)
  • Sriracha sauce (optional)
  1. In a large pot, combine the olive oil, diced onion, sliced radishes and spices. Heat over medium heat and cook until the onion and radishes appear slightly translucent.
  2. Peel and dice the sweet potatoes. Add to the large pot and cover all with the broth. 
  3. Bring the broth to a boil and then reduce to a simmer. Cover and leave on low heat until the sweet potatoes are soft, about 15-20 minutes.
  4. Carefully use an immersion blender to blend the soup until it's smooth. You can also blend in a regular blender in batches.
  5. Top with sriracha sauce for an added kick.