Friday, December 23, 2016

Homemade Egg Nog

I love egg nog and I'm a purist. I don't need to add milk to thin the nog out or alcohol to make it tastier. Just straight up egg nog will do. This again falls onto the list of things I didn't think would be hard to find in England. But apparently it is.

When I couldn't find egg nog in the milk aisle, I though maybe it would be in the alcohol aisle and there was something there that looked like egg nog but was called Advocaat. It was terrible. It was alcoholic and creamy like egg nog but just not at all the right thing. It's also mentioned in The Shining when Jack goes to the bar and there's an ancient party happening and the waiter spills drinks on him.


So I was very happy when Joy the Baker added a recipe for homemade egg nog. At the time, my flatmates and I were planning a Christmas brunch before we all jetted back to our respective countries for the holidays. Perfect time to bust out the egg nog recipe.

This was actually very easy to make and if I did it over again, I may even use a little less sugar. I also just cooked the egg whites for breakfast so no wastage.

Six eggs yolks are whisked together with the sugar and nutmeg. In a medium sauce pan, combine one cup each of whole milk and whipping cream. Another half cup of each is poured into a bowl and set aside. The milk and cream in the sauce pan should be heated until it's steaming, at which point, you can pour it into the egg and sugar mixture, whisking as you pour.

Once the eggs and milk are smoothly whisked together, it all goes back in the sauce pan to warm. Whisking constantly, the mixture will thicken slightly at which point, you can remove from heat. Joy suggests heating until it hits 175F but I don't have a thermometer. But beyond that point, the eggs could cook.

Away from the heat, add the reserved milk and cream plus vanilla and more egg nog. The whole mix is chilled for 6 hours (okay, I chilled it for 2 and it still tasted good but is definitely better cold). You can add rum or whiskey to this or enjoy plain.

Recipe from Joy the Baker
Makes 4-5 servings

  • 6 egg yolks
  • 2/3 cup refined sugar
  • 1 teaspoon grated nutmeg
  • 1 1/2 cup whole milk 
  • 1 1/2 cup heavy whipping cream
  • 1 teaspoon vanilla
  • More nutmeg because yum
  1. In a small bowl, pour half a cup each of the whole milk and heavy cream. Set aside.
  2. In a medium bowl, whisk together the egg yolks, sugar and nutmeg until smooth.
  3. In a medium sauce pan, heat the remaining cup of whole milk and cup of heavy cream. Heat until steaming.
  4. Pour the warm milk-cream mixture into the bowl with the egg yolks, whisking as you go. Joy had a great tip to pillow the mixing bowl on a towel so one hand can whisk while the other pours and the bowl doesn't move around.
  5. Next, pour the milk-egg mixture back into the sauce pan and heat over medium-low until the mixture begins to thicken.
  6. Remove from heat and add the reserved milk and cream plus the vanilla and another dash of nutmeg.
  7. Chill in the refrigerator until cooled, 2-6 hours. Serve with rum, bourbon, whiskey or plain. You can garnish with some fresh nutmeg on top or thin with more milk if you find it too thick.

Wednesday, December 21, 2016

Beef Stew

When I visited the US over the summer, it was August in NYC: hot. I was so shocked by the heat and humidity and wondered how on earth I had ever lived in this climate (yes, a mere 3 months after moving to London). Then I walked into AC and remembered, "ah yes, blasting AC makes summer bearable".

Similarly, I seem to have forgotten about how cold winter is on the east coast. It got 'cold' in London a few weeks ago and I was craving some hearty soup or stew. I made a fair amount of soup in the winters in Boston but would use my crockpot for stews.

Not having a crockpot, I resorted to old fashioned beef stew on the stove instead. After reading the warning message about how cold it was in Boston, I cherished this warm stew and packed my warm, wooly socks for my travels back for the holidays.

We start by browning stew beef. Most stores sell red meat already cubed for stews but you could also get strip steak and cut it up yourself. It's important to only brown the beef because it will be cooked further with the vegetables and if you've already cooked it during the browning process, the meat will be tough and chewy.


Once the beef is browned, set on a plate and use the same pot to brown onions and garlic. Don't worry if you see the bottom of your pan collected burned bits. The stew will soak those up and add delicious flavors.


Add the water and bouillon or just broth to the pot. I use bouillon cubes here and instant hot water (pro tip). The instant hot water really helped clean the bottom of the pans of all the meat and onion drippings to incorporate into the stew.


To the pot, add your carrots and potatoes along with spices. Allow them a head start in cooking before adding the mushrooms and beef. The mushroom and beef won't need as much cooking time and you don't want to over-cook either.

The whole stew should simmer for 30-45 minutes or until the vegetables are soft. Serve hot or reheat for those cold winter nights.


 Recipe
  • 3 Tablespoons vegetable oil
  • 2 pounds stew beef (cubed meat)
  • 3 cloves garlic, minced
  • 1 medium onion, diced
  • 4 cups beef  broth or water with bouillon cubes
  • 1/2 teaspoon paprika
  • 1/2 teaspoon salt
  • Dash of black pepper
  • 2 large carrots, roughly sliced
  • 1 large potato, peeled and cubed
  • 5-6 button mushrooms, sliced
  1. In a large pot, heat the oil over medium heat and brown the pieces of beef on each side. Reduce the heat as needed.
  2. Place beef on a plate lined with a paper towel.
  3. In the same pot, brown the minced garlic and diced onion until translucent.
  4. Pour the broth or water into the pot.
  5. Add the carrots and potatoes with the paprika, salt and pepper. Cook for 5-10 minutes. 
  6. Add the beef and mushrooms. Lower the heat to a simmer.
  7. Allow to simmer for 30 minutes (possibly longer) until potatoes and carrots are softened.

Monday, December 19, 2016

Gingerbread Muffins

We've moved on from fall. You haven't? Well, that's awkward. Bust out some festive socks and blast some Josh Groban/Michael Buble, stat! And while you're at it, get these muffins in the oven too. Previously we did a combo apple-pumpkin-gingerbread muffin but no more. We are full on gingerbread this week.

It's gonna be sticky because gingerbread usually is but it's also gonna be delicious. Stick with it (ha, get it?). Okay, the cold meds are showing, focus.

 
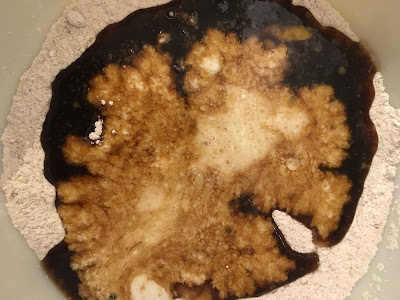
It seems like the theme of 2016 holiday baking for me has been treacle (molasses). I used an entire can of it in a month and I think I'm set for now on gingerbread things. But first, muffins!


Dry ingredients are combined in one bowl, wet ingredients in another. If you measure the vegetable oil first, the honey and molasses will easily pour off the measuring spoon into the wet ingredients. Mix the oil, honey, treacle and eggs in a small bowl. Add to the dry ingredients and mix in the milk as well.

 
It gets a little sticky because honey and treacle are just that. Spoon into a prepared muffin pan (I wonder what would happen if you made a muffin cake...is it then just a cake?) and bake until firm.

You can dust with powdered sugar for a festive appearance or enjoy plain.

 
Recipe

  • 2 1/2 cups all-purpose flour (300g)
  • 3/4 cup plus 1 Tablespoon brown sugar (160g)
  • 1 teaspoon baking powder
  • 2 teaspoons cinnamon
  • 1 teaspoon ground ginger
  • 1/4 teaspoon ground cloves
  • 1/4 teaspoon salt
  • 2 eggs
  • 1 teaspoon vanilla
  • 1/3 cup plus 1 Tablespoon vegetable oil (100ml)
  • 5 Tablespoon honey
  • 2 Tablespoon treacle (molasses or an additional 2 Tablespoons of honey)
  • 1/3 cup plus 1 Tablespoon milk (100ml)
  • Powdered (icing) sugar for garnish (optional)
  1. Preheat the oven to 350F. Line a muffin tin and set aside.
  2. In a large bowl, combine the dry ingredients (flour, sugar, baking powder, cinnamon, ginger, cloves and salt).
  3. In a small bowl, whisk together the eggs, vanilla, oil, honey, molasses and milk.
  4. Pour the wet ingredients into the dry ingredients and stir until combined (you can use a wooden spoon or rubber spatula).
  5. Spoon the batter into the muffin tin, filling each cup about half-way. 
  6. Bake for about 30 minutes or until firm and a skewer poked in the middle of the muffin comes out clean.
  7. Garnish with a dusting of powdered sugar if desired.
  8. Makes about 12 muffins, maybe a couple more if you make smaller muffins.


Tuesday, December 13, 2016

Fruit Cake

When I think of my Grandma, I don't picture her in the kitchen all the time baking or making fancy meals. I remember she always made two kinds of meatballs (Swedish and red sauce), kept candy in her purse and sugary snacks in her cupboards. Even though she spent most of her life in California, she used canned goods like a good Detroit native but made homemade applesauce from the tree in their backyard in Cupertino.

It wasn't until after she died last year that I learned she would make fruit cakes at Christmas and took photos of herself with flowers people sent her. At her funeral, we looked through a lot of photos and sure enough, there was Grandma displaying a flower arrangement and lining up fruit cakes on the counter.

There are so many things I know I'll never get to ask her about her life, about my life, and although I haven't found her fruit cake recipe yet, I wanted to at least give it a whirl in memory of a stellar lady. And it seemed fitting to be a little closer to her a year after she passed away. 

Previously, my only experience with fruit cake was in 7th grade, reading Great Expectations (or some Charles Dickens novel) and my teacher brought in fruit cake for us to try. I know there are mixed reviews out there on fruit cake and whether it's light or dark, round or rectangular, raisins or dried fruits, booze or no booze. I don't remember having an averse reaction to the fruit cake but I wasn't like 'I have to make this'.


There are too many varieties to really pick one randomly but I knew I wanted a loaf fruit cake, not a round cake, and I wanted it to be boozy. So Joy of Cooking did me proud and provided this recipe.

It honestly sounded like a marathon, 1-3 hours of baking?? This actually only took about 1 hour but I also made about 6 smaller loaves instead of 1-2 big ones. 

First and foremost, cream the butter. Then add the sugar (only 2 cups...). Then eggs. Then molasses (treacle). Then citrus juice. Then a flour mixture alternating with brandy. If you have egg nog, pour some brandy in a glass with that nog and sip as you go along. 


Now for the fun part: all of the fixins. So much fruit. The recipe called for candied fruit which I believe was meant to be citrus, cherries and pineapple but here, it's raisins, currants and sultans (the bag even said 'great for fruit cakes'). On top of that, we add dates. On top of that we add walnuts. And then some golden raisins. And then some currants. At this point, I hope your biceps are really working because this batter is so thick and chopped full of fruit. It's amazing.


Spooned into the prepared pans (6 for me, maybe 2 for you). These all barely fit in my oven but I made it. And I even rotated them half-way through for even baking. So fancy. 

These should keep for a bit, maybe 3-4 weeks or you can freeze them. At least, I hope they keep because I mailed them back to the US, surprise!


Recipe

  • 3 cups all-purpose flour
  • 1 teaspoon baking powder
  • 1/2 teaspoon baking soda
  • 1/4 teaspoon salt
  • 1 teaspoon ground cinnamon
  • 1 teaspoon ground nutmeg
  • 1/2 teaspoon ground cloves
  • 1 cup (2 sticks in US) unsalted butter, softened
  • 2 cups brown sugar (packed)
  • 6 eggs
  • 1/2 cup molasses (treacle in UK)
  • Grated zest and juice of 1 orange
  • Grated zest and juice of 1 lemon
  • 1/2 cup brandy
  • 2 1/2 cups mixed candied fruits
  • 2 cups chopped walnuts
  • 1 1/2 cups chopped dates
  • 1 1/2 cups currants
  • 1 1/2 cups golden raisins (I used mixed)
  1. Preheat the oven to 300F and grease two 9x5 loaf pans. I used 6 smaller disposable aluminum pans.
  2. In a medium bowl, combine the dry ingredients (listed above until butter). Lightly mix together.
  3. In a large bowl, cream the butter with a hand or stand mixer until pale and fluffy. Add the eggs, one at a time.
  4. Beat in the brown sugar. Then add the molasses and mix until everything is smooth.
  5. Mix in the citrus zest and juices. 
  6. Next, alternate adding the flour mixture and the brandy. The batter will become thick but make sure the flour mixture is incorporated completely.
  7. Lastly, add the candied fruits, walnuts, dates, currants and raisins. I found it best to add these one at a time and fold in rather than all at once.
  8. Spoon the batter into the loaf pans, filling about half-way.
  9. If using two larger pans, this will likely require 2 hours to bake through. I found the smaller pans only took 1 hour to bake. 
  10. Bake until firm and cooked through.
  11. Serve warm or cooled. Joy of Cooking suggests these will keep for up to a month or longer if refrigerated. I'll let ya know....


Monday, December 12, 2016

Mince Pies

'Tis the season so we're taking a break from Muffin Monday in favor of Mince Pie Monday. Mince pies are to Brits what egg nog is to Americans. Side note: still haven't found egg nog in England, so sad. Mince pies are brought to every Christmas party, Secret Santa and office function with every store advertising their award winning mince pies.

 
I cheated a little bit here, I bought the mince. I always thought mince pies were filled with meat, probably because minced meat is a meat thing but mince pies are filled with mince that consists of a mix of soft fruits and sometimes nuts. It seems pretty common to use raisins, currants and apple in mince filling. 

In my defense, I made the pie crusts based on Mary Berry's recipe so there's some solid pro dough in these mince pies. She also has a recipe for the filling if you don't live in the UK where it's a common jarred baking ingredient.


Cold butter is cut into flour and powdered (icing) sugar. Orange zest gives the crust a nice tang. The butter is cut into the powdered mix either with a fork (what I did), your hands (also happened at one point), or food processor (smart choice). Once the dough is crumbly, add one egg and mix together. Here's where hands are--handy. The dough should come together into a ball like you are making pie crust (because you are making pie crust! Tiny little pie crusts).

 
On a well-floured surface, roll out the dough to the desired thickness. I used a glass but if you have a biscuit cutter, cut circles of dough that will fit in a muffin tin with enough dough to go up half the sides of the muffin tin. 

Spoon a full tablespoon of mince filling into each pie shell. Roll more dough out and use a star cookie cutter to make the top of the mince pies. You can also make another circle top or use a different cookie cutter shape but stars seem to be the traditional route. 


Gently place the stars on top of the mince and press the edges against the edges of the base dough. Brush an egg wash over the tops for a nice golden brown finish.

 
Bake for 15 minutes or until golden. The mince pies should cool before you try to remove them from the tin, otherwise they'll fall apart.

 
Recipe (oh metric)
  • 175g plain flour (roughly 1 1/2 cups)
  • 25g icing sugar (powdered sugar, about 1/4 cup)
  • Zest of 1 orange
  • 75g unsalted butter (mmm difficult to translate, weighing is best but less than 1 cup)
  • 1 egg for dough
  • 350g mince pie filling
  • 1 egg for egg wash
  1. Preheat oven to 150C (300F).
  2. In a medium bowl (or food processor), combine the flour, sugar and orange zest.
  3. Cut in the butter using a fork or process in your food processor until the mixture is crumbly.
  4. Add the egg. Mix until the dough comes together. You may need to add some water if it's too dry, a teaspoon at a time.
  5. Mix until the dough forms a ball. I found it best to wrap in plastic wrap and refridgerate for a few minutes before rolling to prevent sticking.
  6. On a well floured surface, roll out half of the dough (you can roll more out later if needed). Use a glass or biscuit cutter to cut circles.
  7. Place the dough circles into a muffin tin with the sides reaching up to 1/2 the tin.
  8. Spoon mince mixture into each pie crust.
  9. Roll out remaining dough and cut tops for the mince pies (stars, circles, hearts etc.).
  10. Place the top dough gently over each mince pie, pressing the edges against the bottom shell to make a seal.
  11. In a small bowl, whisk another egg and gently brush the tops of each pie with the egg wash. 
  12. Bake for 15 minutes until golden.
  13. Allow to cool before removing from tin and serving either warm or cool.