Tuesday, December 31, 2013

Butterbeer and Bourbon

As we approach the end of 2013, it is a time for reflection and champagne drinking. I'll spare you the reflection piece and skip straight to the fun baking and boozing part of the post. Last year, a friend of mine hosted a Harry Potter Yule Ball. You might remember that golden snitches and chocolate frogs were had by many. Well, the truffles were delicious but also rather messy and I've always wanted to try butterbeer so butterbeer cupcakes made it onto the second annual Yule Ball menu.

Last year's treats

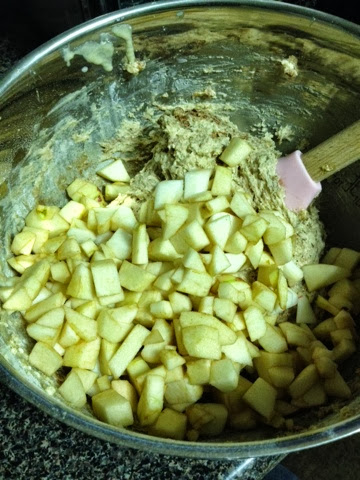
While I was moments away from joining a friend in Harry Potter World for the New Year, I have never actually had butterbeer. When I was a kid and the movies didn't exist yet, my brother and I would imagine that butterbeer tasted a bit like cream soda. Turns out we weren't the only ones who thought this as it's a key ingredient to these cupcakes.

Butter extract? Concentrated butter flavor? Sold.

This recipe comes in three parts: the cake, the filling and the icing. The most complicated part was getting the filling into the cupcake since it was more like a syrup than a filling. Generally, I like butterscotch but the smell was a little strong for me. It turned out great in the cupcakes though! I received a frosting gun, for lack of a better term, for Christmas so was able to make these a little prettier than my usual cupcakes. I'm pretty pumped to test it out in the future and make roses and pretty designs.

Accio cupcakes (yes, that just happened)

The second adventure in boozy baking was a bourbon chocolate cake. My roommate gave me a 365 day dessert cookbook, let the mayhem begin! This cake stood out to me as festive with its rich chocolate and festive bourbon. Now, this cake was being taken to a family gathering with kids and I learned from bourbon banana bread that not all of the alcohol bakes out. Maybe it won't get you buzzed but you can still taste it. Since there would be kids at this party, I poured some of the batter into a baking pan of Christmas shapes before adding bourbon to the mix.

Chocolate and bourbon, Lemon out

As for the rest of the batter, that was poured into a bundt pan and was a huge pain to get out once it had cooled. Despite spraying with non-stick, I made just a few dents in the pan trying to coax the cake out, only to have it split in half. Fortunately there is also a ganache that goes overtop. I will say that after making bark and chocolate frogs and ganache, I would highly recommend melting chocolate in a double boiler and not in the microwave. I have a 50-50 tract record with successfully melting it in the microwave and burning it to crumbly pieces. Just melt it on the stove, it's much easier to keep an eye on too.

Mmmm, we're gonna need a minute

Despite my warning of bourbon, the kids still tried the cake (and immediately spit it back out, much to the delight of their parents who wanted the boozy cake). So the lesson of today is, not all of the alcohol burns out.

On a fancy New Year note, I had a cupcake once that had champagne soaked raspberries in the center. I should really add that to the list for next year's New Years celebration, if only to bulk up before dancing til the wee hours of the morning.

This was the motto of 2013, still working on the 2014 one though

And on that note, eat and drink responsibly and enjoy the end of 2013! I for one will be saying a fond farewell through excessive dancing and motto brainstorming.


Butterbeer Cupcakes (makes 18)

For the cake:
2 cups flour
1 1/2 teaspoon baking powder
1/2 teaspoon baking soda
1/4 teaspoon salt
1/2 cup (1 stick) unsalted butter, softened
1/2 cup granulated sugar
1/2 cup dark brown sugar, packed
3 large eggs
1 1/2 teaspoon vanilla
1 teaspoon butter flavoring
1/2 cup buttermilk
1/2 cup cream soda
  1. Preheat the oven to 350 degrees and line cupcake pan with wrappers
  2. Combine the dry ingredients through the salt in a bowl and set aside.
  3. Cream the butter (at room temperature) until it is creamy and fluffy. Add the sugars and mix until combined. 
  4. Add the eggs to the butter-sugar mixture, one at a time. Next add the vanilla and butter flavoring.
  5. Alternate adding the buttermilk, cream soda and dry ingredients to the butter mixture. Mix until all ingredients are combined.
  6. Pour the batter into the cupcake liners until they are 3/4 full.
  7. Bake the cupcakes for about 15-20 minutes or until a toothpick placed in the center comes out clean.
  8. Allow cupcakes to cool completely before adding the filling and icing. 

For the filling:
1 11-oz. package butterscotch chips
1 cup heavy cream
  1.  In a double boiler (or microwave), melt the butterscotch chips and add the heavy cream until combined.
  2. Using a squeeze bottle would be easiest here to add the filling to the center of the cupcake but you can also use a toothpick to create a space for the butterscotch and slowly add the filling.
  3. Reserve 1/3 cup of the mixture for the icing and more if you would like to add a drizzle to the icing.
For the icing:
1/2 cup (1 stick) unsalted butter, softened
1/3 cup butterscotch filling
1 teaspoon vanilla
1 teaspoon butter flavoring
1/8 teaspoon salt
1 16-oz. package powdered sugar
Splash of milk (as needed)
  1.  Cream the butter until it is creamy and fluffy. Add the remaining ingredients except the powdered sugar until combined.
  2. Add the powder sugar one cup at a time until all ingredients are mixed together. If needed, add some milk to thin the icing.
  3. Pipe the icing onto the cupcakes in whatever design or fashion you desire.
  4. Drizzle remaining filling on top of cupcakes or leave plain. Or add sprinkles. Or sparkles.
Bourbon Chocolate Cake
1 cup (2 sticks) unsalted butter
4 oz. bittersweet chocolate, chopped
1/2 cup unsweetened natural cocoa powder
2 cups all-purpose flour
1 teaspoon baking soda
1/2 teaspoon salt
3 large eggs
2 cups granulated sugar
1 cup sour cream
3/4 cup bourbon
2 teaspoons vanilla extract
  1. Preheat the oven to 350 degrees. Butter and flour a bundt pan and set aside.
  2. In a saucepan, melt the butter and the 4 ounces of chocolate. Stir over low heat and add the cocoa powder until smooth. Set aside and let cool.
  3. Whisk together the flour, baking soda and salt in a bowl. Set aside.
  4. In a separate bowl, beat the eggs and sugar until lightened. Stir in the sour cream, bourbon, two teaspoons of vanilla and the chocolate mixture.
  5. Lastly, stir in the dry ingredients until combined. Pour the batter into the prepared pan.
  6. Bake the cake for 40-45 minutes or until a skewer placed in the center of the cake comes out clean.
  7. Allow the cake to cool for about 15 minutes before unmolding the cake and allowing to cool completely. Cooling racks could be used here but I don't have one so skip that part.
Glaze
 4 oz. of bittersweet chocolate
1/4 cup heavy cream
2 Tablespoon light corn syrup
1 teaspoon vanilla extract 
  1. While the cake cools, warm the cream in a sauce pan.
  2. Add the 4 ounces of chocolate and corn syrup to the cream. Whisk until the chocolate is melted and smooth.
  3. Let the glaze cool to room temperature before adding the vanilla extract.
  4. Pour the glaze over the cake. Place on a festive platter and serve (to adults).

Monday, December 30, 2013

Coconut Almond Caramel Popcorn

Dear Readers,

It's been a long December. Historically one of my favorite months, this year it was a rough one somewhat lacking in Christmas magic. The holiday season is my absolute favorite with the music and the lights and trees and shiny ribbons and gift wrapping. Absolutely love everything about it, despite the crazy shopping and gifts part of it. I find it all amazing so I look forward to it all year long and capitalize on the season as soon as Thanksgiving is over. This year, however, was the first year I can remember feeling like a grown-up and like the Christmas magic was lost. Between work stress and personal drama, Christmas got away from me (cue Carrie Underwood singing Where Are You Christmas? on repeat).
I do love Christmas trees

Trust me, I still did the tree thing (a real tree because how else would I get the proper scent?!) and wrapped presents and decorated. I even hosted an ugly sweater party and wore a fabulously hideous creation from 1993. But for the most part, I was checked out this past month. However, there was plenty of therapeutic baking going on which brings me to the relevant part of this post. Homemade gifts. So when the going gets tough, bust out some butter. I was extremely well stocked on the butter front and ventured to create homemade goodies for my friends.
Showcasing the fabulous sweater. It has bells too.

The largest of these endeavors was coconut almond caramel popcorn from none other than Shutterbean. Caramel popcorn to me always comes in those giant tins sold by the Boy Scouts at random. This was so simple, I may have to do this more frequently for myself. Which means you too can create caramel popcorn at random, it's not strictly a holiday food like Christmas cookies.

Popcorn is made the old fashioned way with raw kernels in a pot rather than the microwave. I would also like to note that now I have a large supply of popcorn kernels for future consumption. While popping the kernels, shredded coconut is toasted. According to Shutterbean, the coconut will brown slightly however my coconut was either too generic or too old to look that fancy. It still tasted like coconut though so we're all set there.
All that remains is the caramel sauce

The popped popcorn and plain almonds are layered in a 9x13 pan with coconut on top. Next comes the caramel sauce, my favorite part of the recipe. I wish I had a before-baking soda picture because the mixture expanded in a magical fashion. So you melt all the delicious things like butter, sugar and corn syrup together and poof goes the mix with the final addition of baking soda. This is poured over the popcorn mixture to make a sticky mess of amazingness. The whole lot is baked in the oven for another half hour. Once all the work is done, spread the mixture over wax paper to cool before packaging and mailing to friends. Make sure you take a few bites just to be sure it's kosher.
Nice and fluffy

I was also going to venture to make caramels I read about in Bon Appetit magazine but Shutterbean beat me to it and I don't have a candy thermometer so a minor set back there. The remaining almonds were spiced and toasted under the supervision of Joy the Baker (vicariously, she unfortunately was not actually in my kitchen).
Toasted almonds from JTB

The last homemade gift was simple bark. This is almost a cop out, it's so easy but I was rummaging through my miscellaneous baking supplies and using things up as I went. Melt chocolate (white chocolate or milk chocolate or dark chocolate, any kind with sugar really) in a double boiler and spread thinly over wax paper. Spread the chocolate to whatever thickness you would like your bark to be. While the chocolate is still soft, sprinkle with dried fruit or candy. For the dark chocolate, I added dried raspberries on top but for the white chocolate, I crushed candy canes to make a peppermint bark. Once the chocolate has dried/hardened, break apart and package into cute baggies. I was worried the chocolate would later melt so I kept them in the freezer but I believe this was an unnecessary precaution.
Easy bark

At any rate, for the first time ever, I'm happy that December is over. I can't believe it but I actually took my Christmas decorations down already and happily so. As Meet the Robinsons says, keep moving forward. Time to move on to a new year and new adventures. Lucky 2014, here we come!
Last but not least, a Christmas montage

Monday, December 9, 2013

Roasted Red Pepper and Cauliflower Soup

Winter is rapidly approaching, complete with icy winds and cold, cold temperatures. There’s nothing I like more than to snuggle on the couch with a blanket and a mug of soup on a cold rainy day in the winter (or cold, snowy day). Unfortunately, I have a 9-5 job which makes productivity on such gloomy days pretty poor since I would rather be under the covers.

This looks pretty great to me
Instead of dwelling on my lost youth of freedom and snuggles, I have turned to the interwebs to develop a repertoire of soups. I made a couple soups last year but since the discovery of an immersion blender, soups are a favorite. This soup was picked off of Pinterest for its appearance as tomato soup, a  personal fav and grilled cheese partner. Of course this post is entitled Roasted Red Pepper and Cauliflower soup, not tomato. This is why we don’t judge books, or food, by their covers.

When I was a kid, my mom would make us eat our vegetables but not just the acceptable broccoli and carrots but the ever-disgusting brussel sprouts and cauliflower. Our distaste was met with “you’ll love them when you’re older” to which I replied “great, feed them to me when I’m older”. This just in: I still do not like brussel sprouts or cauliflower. However, I’m an adult and can give cauliflower a try when it is immersed in red peppers and other flavorings.
The dreaded cauliflower 
While I cringed throughout the whole chopping and touching of the cauliflower, I made it through. But for real, doesn't it look like some alien plant related to a Venus fly trap or that poison flower from Jumanji? It’s a thing.

The red peppers are roasted in the oven and then steamed to loosen the skins. FYI: the skins did not come off and the soup still tasted great. Cauliflower is roasted (in the same pan because I’m lazy) while the peppers are steaming. Just before the cauliflower is done, cook the onions in a giant pot (big enough for all the soup) until your eyes are running and the onions are translucent. Combine the peppers, cauliflower and spices into the pot and pour the broth over all ingredients. And don’t forget the goat cheese! I tried to shred a giant block of goat cheese but eventually just dropped a blob of it in there. I only used half of the goat cheese block because I can mix the rest with some avocado and make a spread for toast to go with the soup! Allow to cook until vegetables are done and soup looks nice and hot. I let it cook and then simmer for about 30 minutes.
Getting closer to soup!

Remove the pot from heat for a little bit, just to cool it off before immersion blending it (or regular blending it in batches). I was preparing this a day ahead but if you’re eating it straight away, you don’t need to let it cool for as long. Immersion blending is exciting but can be splashy so boiling hot soup to the hands is never fun. I know this for a fact.
Ready for blending!

The good news is, you can’t taste the cauliflower. The more good news is this was a delicious and healthy alternative to—something else dinner-like. I might be addicted to soup now. There’s something satisfying about knowing everything that goes into your meal. Down to the last grain of pepper! Plus I have way too much fun mixing the soup with the immersion blender, making sure it’s perfectly smooth. The phrase ‘double, double toil and trouble’ comes to mind—frequently. This soup pairs well with some toasted baguette for dipping, in case you were still hungry. Have a good day, readers: I’m off to snuggle with this soup—and my cat. 

Recipe
  • 4 red bell peppers, halved 
  • 1 head of cauliflower, chopped into bite-size pieces (florets)
  • 1 white onion, chopped 
  • 2 tablespoon olive oil (used twice in 1 tablespoon increments)
  • 2 cloves of garlic, chopped
  • 1 teaspoon of Thyme 
  • 1 pinch of red pepper flakes (more for a spicier soup)
  • 4 cups of broth (chicken or vegetable, depends on your preference) 
  • 1 teaspoon of Paprika
  • 4 oz or less of goat cheese 
  1. Cut red peppers in half and place face-down on a baking sheet. Place in the oven set to broiler (I don't have a broiler function so just set it to 300 degrees). Allow peppers to cook for about 10 minutes or until skins begin to blister. Remove from the oven and place in a sealed container to steam for 20 minutes while the cauliflower cooks.
  2. Mix chopped cauliflower with 1 tablespoon of olive oil and any seasonings desired (I used black pepper). Place florets on the baking sheet and cook in the oven (set now to 400 degrees) for 20-30 minutes. 
  3. While the peppers and cauliflower are cooking, chop the onion and place in the large pot with the other tablespoon of olive oil. Allow to cook for about 5 minutes or until onions are tender.
  4. Add thyme, red pepper flakes and chopped garlic in with the onions. Allow flavors to seep together until you can smell them mixed with the onions.
  5. Attempt to remove the skins from the peppers by pinching where the skin appears blistered. If this doesn't work, no worries. Just go ahead and chop up the peppers and add to the pot with onion. Remove the cauliflower from the oven and add that to the pot as well.
  6. Pour broth over vegetables and add the paprika and goat cheese. I only used 2 ounces of goat cheese but more will increase the creaminess of the soup.
  7. Allow to cook until vegetables appear tender and the cheese has melted.
  8. Remove from heat, if desired, to cool until blending. If you are eating this right away, use an immersion blender to blend the soup to the desired consistency or use a regular blender and pour the soup into the blender in batches. 
  9. Gather soup into an over-sized mug and locate nearest sofa with blanket. Curl up and enjoy! 

Sunday, December 1, 2013

Flourless Chocolate Cake

Let's face it, I'm an amateur. I have hopefully never led you to believe otherwise, but I am an amateur baker. You say things like "I'm vegan" or "I don't eat gluten" and you will be met with a shocked look as I have just offered you poison and there is nothing I can do about it. And until recently, I believed there was nothing I could do to prevent this shocking moment, I didn't know how to make flourless or vegan baked goods. If you have these restrictions, you were being fed vegetables at my table.

But we live and learn. I have created a vegan pumpkin bread and realized that simple substitutions can turn the tastiest of treats into vegan-friendly desserts. And when presented with a gluten-free challenge for Thanksgiving dessert, I was sensible and Googled for recipes. 
Butter and I are running away together
Real Simple has a flourless chocolate cake recipe that made flour seem like a thing of the past. There were so many other delicious ingredients like chocolate and butter and more chocolate that it couldn't go wrong (spoiler alert: it went very right). In true amazing fashion, butter and cream are melted together before adding in bittersweet chocolate. While the butter is melting, feel free to pick at the chocolate pieces because they're delicious and you deserve it. 
Chocolate will be joining us as well
As the butter mixture is melting and then cooling, mix together the eggs, cocoa powder and sugar. Use the butter wrappers to butter a 9-inch spring form pan (for those of you who do no know what that is--dad--it's that pan you make cheesecake in with a clamp on the side) and add cocoa powder (not flour, we're keeping this gluten-free) until the pan is thoroughly dusted. Once the butter and chocolate mixture has cooled, we add it to the egg mixture. The whole lot is poured into the prepared pan and the bowl licked--I mean scraped, clean. 
Missed a spot!

After the oven is preheated to 350 degrees, place the cake on the center rack. Bake for 20-30 minutes or until a toothpick comes out of the center clean. Allow the pan to cool outside of the oven for about an hour before attempting to remove the cake. Dust the top with powdered sugar for added finesse. 
Not a drop of batter wasted
This cake is very rich and dense so is best served in small slices with a whipped topping or strawberries (or both). It also pairs extremely well with red wine and a charming fire. 

Although this was not a traditional Thanksgiving dessert like pie, it was a great way to incorporate a new twist into the dessert table. This will definitely be making an appearance at holiday parties in the coming months, if only so I can eat the leftovers while watching holiday movies on the couch.
Grab a fork and dig in!


Recipe
  • 1 cup (2 sticks) of unsalted butter
  • 1/4 cup of heavy cream
  • 8 ounces of bittersweet chocolate chopped into pieces (or chocolate chips)
  • 5 eggs
  • 1 cup of granulated sugar
  • 1/4 cup of unsweetened cocoa powder plus more for dusting pan
  1. Preheat oven to 350 degrees. Using the butter wrappers, butter a 9-inch spring-form pan and dust with a sprinkling of the cocoa powder until the bottom and sides of the pan are darkened. Set aside.
  2. In a saucepan, melt the butter and heavy cream together over medium heat. Once the butter is melted, add in the chocolate (don't forget to sneak a few pieces for yourself). Remove from heat once chocolate is completely melted.
  3. In a medium bowl, whisk together eggs, sugar and unsweetened cocoa powder. Once combined, whisk in the butter mixture and stir until combined.
  4. Pour mixture into prepared pan. Place the pan in the oven and bake for 30-40 minutes or until cake puffs up and appears set. 
  5. Allow cake to cool outside of the oven for about an hour before attempting to remove it from the pan. To remove the cake, run a knife along the edge of the pan before un-snapping the spring-form. For best results, use a cake spatula to run along the bottom of the cake to transfer to a dish. Or just leave it on the spring-form bottom and place altogether on a serving dish.
  6. Dust with powdered sugar and serve with whipped topping or ice cream of choice (and red wine, don't forget the wine).

Thursday, November 28, 2013

Happy Turkey Day!

We’re goin’ south, ya’ll. Okay, it’s probably not considered the South (although it’s below the Mason-Dixon line so technically the South) but we’re going further south to the land of no cell reception, where the only radio station plays Jimmy Buffet’s “Heeeeey good lookin’, Whaaaaat you got cookin’”. No joke.

Thanksgiving this year brings me back to my roots. I’m staying at my grandparents house, a house that hasn't changed since I was born except for some kitchen updates and wallpaper removals. It really takes me back to when I pretended to be a chemist and mixed every spice I could find into a bottle with lemon juice and declared it “Spring in a Bottle”. Or that time I shattered the lid to the flour jar, completely by accident, and became inconsolable because it no longer matched the sugar jar. To this day, that jar lid has been replaced by one my grandfather fashioned as a replacement. And the legend lives.

One of these things is not like the other
My grandmother’s kitchen is very open and always the center of attention. So naturally it’s where I found myself pretty frequently for birthdays and holidays and general gatherings. Although the appliances have all been updated, the pictures of us as toddlers remain the same (why do we bother with school photos when we’ll never be as cute as we were with chubby cheeks?). The handmade ‘rustiques’ still hang on the walls, made by my grandmother once upon a time and sold under the name “Kilroy”. Another family legend, I have yet to see these plaster fruits anywhere else so it could be true.


Rustiques: (n) constructed fruits attached to driftwood 
This post contains no recipes. There will be plenty of post-Thanksgiving recipes for pie and cookies and cake but for now, just remember that Thanksgiving is a time to be with family. Make some memories, blow up some chestnuts because you forgot to scour them (true story), eat so much pie that when the dog eats one, you get blamed (also a true story) and don’t consider the calories or fat content while you’re doing it. Thanksgiving is historically the over-eating holiday but it doesn't seem to stop people from going on about how fattening the desserts are and how much butter is in the sweet potatoes. Unless you have a medically prescribed diet, just enjoy the butter. It’s one day of the year and family is more important than any number of calories. Please, let’s move on. 


I was grateful on Tuesday for some crazy cool things at the grocery store (Chinese cabbages would make great Christmas center pieces, if you ask me)
There is so much to be grateful for and today we focus on that. I have found myself looking at my fridge as I prepare to cook and thinking "I am so fortunate to have this full fridge". Everyday gratefulness is also acceptable. Life has its stresses, everyone has them whether they make them known or not. There will always be a deadline or a worry about this, that or the other but at the end of the day, we are lucky. We are lucky to have enough food, to have shelter, to be living our lives and not struggling to stay alive. Everyday things we take for granted. I have a friend who posts one thing she's grateful for everyday and it's not always these big things but little things like "I'm grateful for this beautiful view". It's the little things in life so with that in mind, have a very Happy Thanksgiving and dig into that second piece of pie!

This is a great view to wake up to


Friday, November 8, 2013

Red Thai Curry Sauce...Soup

I'm one of those people who orders the same things at restaurants I frequent. It's not like I don't like new things but when I go to a place with a huge menu or a bunch of things I can't picture, the default setting kicks in. For example, I'm a huge fan of pad Thai. Granted, it varies from place to place but that is my tried and true go-to for Thai restaurants. Even though I've tried my friends' dishes and they're amazing (and usually in a pineapple), my stomach has been conditioned to get pad Thai.

Pretty simple ingredients 
Well it turns out that I rather like Thai food or at least making some of it. Nothing super fancy, just some spicy Thai eggplant, spicy noodles (to be perfected), and now Thai curry sauce--or in my case soup. 

I came across this recipe during the summer as I longed for cooler days with fall leaves and a cozy blanket. To me, the picture was a bowl of soup, perfect for the fall/winter season. So I gathered my ingredients and set about making this Thai dish. I decided to pass on having quinoa as a side but this would be great over any grain. 
Sneak peak at the final product

As I read through the recipe, I realized that this sounded more like a sauce for chicken and rice but nevertheless, I was adamant in my soup endeavor. 

This literally took 15 minutes to make. Mushrooms and peppers are sautéed in olive oil while the coconut milk is brought to a boil. My coconut milk was making all kinds of freaky bubbling noises but it worked out.
This is called multi-tasking
Fish sauce, curry paste and brown sugar are added to the boiling coconut milk, followed by the vegetables. This soup/sauce can be completed here by seasoning with some basil and any additional spices you desire. The recipe calls for lemon grass but ironically, I skipped this (I couldn't find any, okay?). I decided to add some diced chicken for some added protein (plus it was already cooked and sitting in my fridge). I let this mixture simmer with some basil leaves before serving.

Those bubbles were crazy noisy

When I purchased the ingredients, I bought two peppers instead of the required one because the peppers fit together like puzzle pieces. This is probably from being crushed together in a truck but I couldn't pass up poetic peppers. I also bought the basil in a plastic container but tried to smell it anyways. No luck. When I stand in the produce section I try to be all fancy and know what the heck I'm looking for in fresh vegetables besides a lack of mold. Farmers markets are much more satisfying for smelling fresh produce and hand picking basil. In my dizzy daydreams, I'll have an herb box one day. But them I remember my brown thumb so maybe there are just more farmers markets in my future.

We were meant to be together 

The soup came out very well and if it were to be used as a sauce, I would reduce the amount of coconut milk or only use the creamiest part, much like with the fish curry where we initially separate the milk. I also found my curry paste to be a bit bland so added some cayenne pepper for some added kick.

Snuggle up with this soup and a blanket, winter is coming.

The final product


Sunday, November 3, 2013

Pecan Pumpkin Scones

This is Halloween, this is Halloween, everybody scream!! I didn't think I was such a Halloween person until I had all these opportunities to dress up and decorations to hang! Now my home is a spooky insane asylum (the sign on the door says so) and so far I have had 3 costumes. I guess that makes up for the years in college when I was lame and did nothing for Halloween.

Look at the packed sugar, so packed

Last year, I made some Halloween themed treats. This year, I will still be making spooky treats but not until the weekend. So to celebrate Halloween the adult way, I made pecan pumpkin scones. Scones are serious business and therefore appropriate for the office. 

I'm so bad at crumbly the butter but I guess it worked out 

Now you might be thinking to yourself "Seriously, you just made pecan pumpkin bread. How different could this be?"  Very. Very different. For one, totally different consistency. For another, this has icing on it and it's browned butter icing. Fancy. Pants. And I'm rocking this whole pecan't convert thing.

Crushed pecans

Sometimes I find scones to be very dry and crumbly. For some reason I have always like the idea of them but in reality, usually they require a nice latte to dip them in for some moisture. These stayed nice and soft and are almost like puffy cookies. Some people even mistook them for cookies and who am I to correct them? Whatever makes you happy. I think one day I will try to make them healthy like the other scones I've made (from Health magazine so it's truly healthy).

The glaze for these scones may become one of my go-to icings. Normally when I glaze scones, the glaze comes out too thin and just runs off but this brown butter icing was actually thick enough but still wasn't like frosting. A lovely balance for scones. 

Scones make my utensils happy--or the utensils make me happy

When you're a kid, you know which houses give out the best treats. Who has the king size candy bars, who gives out healthy stuff (avoid those houses) and even who gives out sodas (true story). Everyone knows that my desk has the treats. Granted I sit near the kitchen and it's prime strolling real estate but still, gone like hot cakes! Or like delicious scones. 


The only pretty scones, the rest had glaze smeared everywhere


Thursday, October 24, 2013

Apple Muffins

Mondays are rough, muffins make them better. As previously mentioned, I have a boat load of apples to cool with--and by boatload I mean a bushel. I've found that it's much easier to pass off individually wrapped baked goods onto people than ask that they slice a piece and grab a fork. It's all in the packaging. And thus, with the abundance of apples and psychological experiment conducted, muffin Mondays have returned! At least for this week.

Two cups of apples, at your service 

I hadn't actually made apple muffins before and my usual suspects were full of other muffin varieties. So I took to the interwebs and came across this recipe from King Arthur's flour. Of course this means the recipe called for King Arthur's flour but I'm not picky. However, it did call for both wheat and white all-purpose flours and being the overly stocked pantry that it is, I had a bag of wheat flour chillin and gathering dust.

Ready to mix in the flour!

If I were a true baker and not a faker baker, I would have added some oats and maybe some cranberries to make a cran-apple muffin. But alas, I'm a faker baker and don't know what adding oats would do to the muffin chemistry. Would it be awkward? Would oats be left out? Would it just taste too healthy? These mysteries will remain unsolved for the time being.

Quite the arm workout, mixing everything together

I did however elect not to sprinkle brown sugar on top of the muffins. Partially because I didn't think it was necessary and partially out of laziness. This decision resulted in worrying for 20 minutes that they wouldn't be sweet enough, that I had somehow disrupted the space-time continuum of baking! Again, this did not happen (not that I know of) and the muffins turned out well.

Yield: 12 muffins--false

They were squishy and apply and not too dry. Coffee cake muffins are delicious but sometimes are too crumbly. Not so with these apple puppies. Personally I believe that the Greek yogurt helped to keep them moist (sorry, I know people hate that word) and I hear that's a secret to good sweet breads. One day I will learn to chop things properly but until then, to ensure my fingers remain intact, I will continue to make chunky apple breakfast foods. For added festivity, I used Halloween cupcake wrappers-- which I bought last year on sale after Halloween. Paper doesn't go bad!

Happy Halloween! 

It's cool, muffin Mondays made my day and hopefully a few others as well.

Muffin Monday!

Monday, October 21, 2013

Apple Sharlotka

Last weekend I was finally able to go apple picking! I don't know why I get so excited about apple picking, it wasn't something I did as a kid or have nostalgia for. In fact, the one time I remember going apple picking as a kid was with my brother's Boy Scouts troop and I got stung by a wasp--in my ear. You would think that would deter me from ever apple picking again.


But now that I'm older, and still afraid of wasps, I realize that it's really just a good fall activity to enjoy with friends (yes, very cheesy sentiment). This year apple picking became even more grown up with the addition of wine tasting. Super classy wine tasting apple picking combination. At this particular location, although they were out of cider donuts (the horror!), there were great views of the fall foliage and an abundance of apple varieties. So we purchased our bushel (not to be confused with a peck or a hug around the neck) bags and ventured out to fill the bag with different apples.


After illegally climbing some trees and jumping for the best apples, we left with all kinds of fruits and wines. Lucky for me, last weekend was a three-day weekend. Hallelujah no Monday!! It's like it doesn't exist! Bring on the Netflix and baking. Except when I went to make something of the apple variety I discovered that a) I did not want to make apple crisp again but wanted something new and b) I was feeling very lazy about my baking. Obviously I had to make something but what was simple and would take like 5 minutes?


I scoured the usual sites and consulted my cookbooks and finally came across something so simple, I wondered if it could possibly be real. Apple Sharlotka (fancy in name, simple in making), compliments of Smitten Kitchen, is literally chopped up apples with flour, sugar, eggs and spices. So simple!


After chopping up the apples and dumping them into a spring form pan, you simply mix the remaining ingredients together to form a thick goo that you pour over the apples. Make sure you spread the goo around so the apples are coated. I also added some cinnamon and nutmeg to the apples and tossed them prior to pouring the goo, just for some added zest. In retrospect, I would have added pumpkin pie spice from Joy the Baker.


After less than half an hour, fall was in the house! This was a little difficult to get out of the pan, despite the spring form part and non-stick part. It was kind of like an apple sponge cake and was nice and sticky.

Here's the thing about apple picking though: you always gets more apples than you expect and recipes always require fewer than you would think. So 6-7 apples later and I still have 9-10 to go. More apple treats to come!


Sunday, October 13, 2013

Pecan Pumpkin Bread

As some of you may know, as recently as last year, I was a pecan't convert. I became a fan of pecans which opened up a whole world of crunchy, delicious baking opportunities. This includes pecan pumpkin bread, and as an added twist, it's vegan friendly! I'm not sure that vegan should be alarming to anyone, nothing like sugar free (jokes, sugar free things taste pretty good usually) and yet I decided to get people's opinions before sharing that it was vegan.


Being a vegan recipe was pretty convenient as I didn't have much butter left in my fridge. It's also excellent that one batch makes two loaves: one for work and one for my own consumption.  Using only one small can of pumpkin and festive fall spices makes this bread taste like the spirit of fall. Pecan pieces, or in this case whole pecans out of laziness, add a nice crunch. During the baking process, they get slightly toasted. Honestly I hardly noticed the difference in texture that the pecans provided. Typically my issue with having nuts in breads is the texture conflict between the crunch and softness of the bread. Not so in this case.


Breads make an excellent gift: hostess or friend or visiting guest or colleague. It takes thought and time and when sent to my grandma, baked with love. Sorry folks, half of you are getting baked goods for Christmas instead of 'real' gifts. But I promise they'll be good and thoughtful.

And check it out, we got fancy with decorating the bread with pecans too! Of course I made a few adjustments. I used dark brown sugar which has more molasses than light brown sugar. I also had juuuust enough flour for this bad boy. 

Lastly, in true fall fashion, I went apple picking (and wine tasting, super classy) today! The fall foliage is coming in quite nicely and it was a beautiful day that will lead to tart and crisp treats. Stay tuned!


Recipe from Joy the Baker:

-3 3/4 cups all-purpose flour
-2 cups packed light brown sugar
-2 teaspoons baking soda
-1 teaspoon baking powder 
-1 teaspoon salt
-1 teaspoon freshly grated nutmeg (or just nutmeg)
-1 teaspoon ground cinnamon
-1 teaspoon ground allspice
-1/2 teaspoon ground cloves
-1 (15-ounce) can pumpkin puree
-1 cup vegetable or canola oil
-1/3 cup pure maple syrup
-1/3 cup water
-1 cup chopped pecans with 8 whole ones for decoration

1. Preheat oven to 350. Grease and flour two 8x4x3-inch loaf pans.
2. In a large bowl, combine the dry ingredients (through ground cloves)
3. In a separate medium bowl, mix together the wet ingrdients (through water)
4. Add the wet and dry ingredients together. Make sure to incorporate all the ingredients and then fold in the pecans.
5. Divide the batter between the two pans. Decorate with whole pecans.
6. Bake for 1 hour or until a toothpick placed in the center comes out clean.
7. Once baked, let rest in pan for 20 minutes before inverting on cooling rack.

Serve warm with ice cream or nutella or enjoy plain!