Friday, October 30, 2015

Sugar Drop Cookies

I'm one of those people who cleans and organizes in times of stress. When I moved last year, I cleaned out  my spice rack, which was a Christmas gift complete with things like Pizza Seasoning and Italian Seasonings. I prefer to make my own seasonings so knew I would never actually use these. But I would use an abundance of sprinkles in my time in the kitchen.

And so, I replaced a row of my spice rack with shakers of sprinkles. Christmas sprinkles, Valentine's Day sprinkles, generic birthday colorful sprinkles and of course, Halloween sprinkles. I used them last year for truffles and cupcakes but this year decided to make some easy sugar cookies.

 
I feel as though I've found a solid recipe for cut-out sugar cookies with still a modest amount of patience and work required. But for simple drop cookies, I hit the books--no, really, I read through cookbooks instead of Googling. Crazytown.

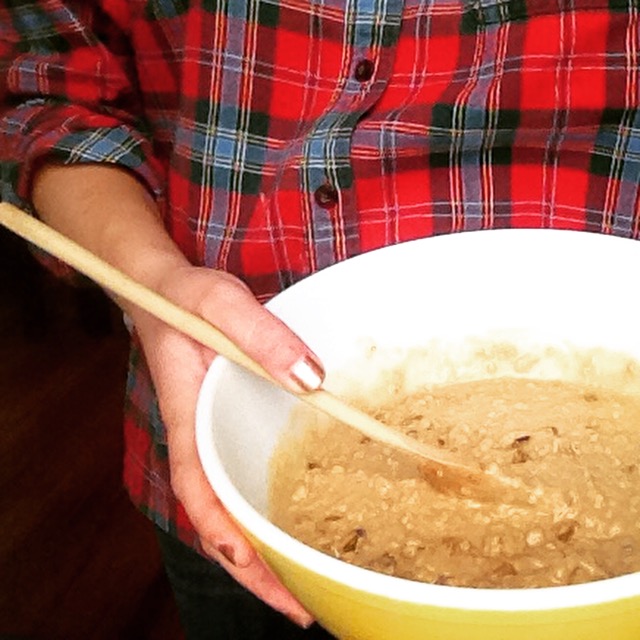
This recipe is from the sage guide Joy of Cooking. There are a lot of recipes in this book but they're very concise and to the point. These drop cookies take about 4 inches of a page and you get a bunch of treats in return. Fair trade. They also have no butter in them so are perfect in a pinch when you decide at 9pm to make cookies for the next day and haven't softened any butter.

Instead, we whisk together sugar and vegetable oil in a large mixing bowl. Eggs and vanilla then added before stirring in a mixture of flour, baking powder, salt and cinnamon. I started with a whisk but graduated to a spoon as I added the flour because the dough got thick. The dough will also get a little shaggy but since we're rolling this stuff with our hands, you can pack it back together.

Similar to how we made the ginger snap drop-cookies, pieces of dough are rolled between your hands. You can roll these in sugar or in sprinkles. Dropping the dough into a pile of sprinkles was like a mini-ball pit. The more I tried to get the dough back out, the further it sank into the sea of sprinkles.

The last step is flattening the cookies. A glass is used to flatten the dough balls. You could leave them alone and they'll spread out but since I used sprinkles, I wanted to make sure they really stayed put.

Baked at 375 for 10-15 minutes, a golden brown and festive cookie emerges. I thought I was going to run out of sprinkles towards the end and considered adding food dye to make orange cookies instead. But in the end, had just enough for these spooky treats.

Recipe
Yields 36-40 cookies
  • 2 1/2 cups all-purpose flour
  • 1 1/2 teaspoons baking powder
  • 3/4 teaspoon salt
  • 1/4 teaspoon cinnamon
  • 1 cup of sugar
  • 3/4 cup vegetable oil
  • 2 eggs
  • 1 teaspoon vanilla
  • Sugar or sprinkles for rolling
  1. Preheat the oven to 375. Spray cookie sheets with non-stick spray (since we aren't using butter, I would recommend this just in case).
  2. In a small-medium bowl, whisk together the flour, baking powder, salt and cinnamon. Set aside.
  3. In a large bowl, whisk together the sugar and vegetable oil until smooth.
  4. Add the eggs one at a time to the sugar-oil mix. Then add the vanilla.
  5. Slowly add the flour mixture to the sugar mixture. You may need to switch to using a spoon instead of a whisk.
  6. Once the flour is completely combined, take a ping-pong ball amount of dough and roll between your palms. Dip in sprinkles (or sugar if using) and place on the cookie sheet.
  7. Continue to fill the cookie sheet, leaving enough space between the dough to allow them to spread.
  8. Before putting in the oven, use the bottom of a glass to flatten the cookies. You don't want to make them too thing but press down enough to make discs.
  9. Bake for 10-15 minutes or until golden brown.
  10. Serve warm or the next day!

Tuesday, October 27, 2015

Chewy Ginger Cookies

I'm never sure if ginger cookies remind me more of fall or the holidays. On the one hand, the spiciness makes me think of the changing leaves. But the concept of gingerbread makes me think of Christmas cookies and decorating gingerbread houses. I think it comes down to the form the ginger cookies take.

I made ginger cut-out cookies a few months ago which I would think are more holiday appropriate. These chewy ginger cookies, however, are perfect year-round. But especially right now because they were super tasty.

There are a lot of ginger cookie recipes out there and they'll vary depending on what kind of cookies you like. I can eat a lot of ginger snaps, in fact, I would feign feeling sick to my stomach to claim I needed ginger snaps to settle it. Whatever floats your boat!

These cookies are nice and soft and chewy. I didn't make them very large but you can adjust the size as you like. As always, we're sifting together the dry ingredients and setting them aside. Room temperature butter, or butter that has been softened with a rolling pin, is creamed before adding brown sugar and molasses. The dry ingredients are mixed in and once everything is combined and a nice amber color, you get your hands dirty.

Using a spoon to grab a chunk of dough, gently roll the dough into a ball about the size of a ping pong ball. Roll the dough ball around in granulated sugar to coat and then place on the prepared baking sheet. The cookies will flatten out so leave an inch to an inch and half between dough balls.

Bake for around 20 minutes until they have crackled on top and are firm. It's hard to tell based on color when they're done but should be cooked through. I ate several of these warm and straight out of the oven but I also sandwiched some of that pumpkin ice cream in there. Delicious.

Recipe
  • 2 1/4 cups flour
  • 2 teaspoons baking soda
  • 1/2 teaspoon salt
  • 1 teaspoon cinnamon
  • 1 teaspoon ginger
  • 1/2 teaspoon cloves
  • 1/4 teaspoon allspice
  • 1/4 teaspoon black pepper
  • 1 1/2 sticks butter
  • 1 cup brown sugar, packed
  • 1 egg
  • 1/4 cup molasses
  • Granulated sugar for rolling
  1. Preheat the oven 375 and line cookie sheets with aluminum foil. Set aside.
  2. In a medium bowl, sift together the flour, baking soda, salt and spices.
  3. In a large bowl, cream the butter using an electric mixer. Add the brown sugar and mix until smooth. 
  4. Add the egg and molasses and continue mixing until combined.
  5. Gradually add in the flour mixture and mix together until you can't see anymore flour.
  6. Using your hands, roll the dough into ping-pong sized balls. Roll in granulated sugar and place on the cookie sheet about 1/2 inch apart.
  7. Bake the cookies for 15 minutes until they are thinned out and firm.
  8. Consume immediately. Or wait, either way they're delicious. 

Thursday, October 22, 2015

Pumpkin Ice Cream

Where there are egg whites, there are egg yolks. Following the fluffy angel food cupcakes, I had a bunch of egg yolks leftover. And I don't like to waste food so those egg yolks went into ice cream. It's not exactly ice cream season but it is pumpkin season so let's enjoy the unseasonably warm weather with some ice cream.


I recently wondered what the purpose of an ice cream maker is. You still need to put the mixture in the freezer to thicken so why do I also have to churn it in a frozen bowl for awhile? Upon discussing with a colleague, the conclusion was the churning is necessary or the mixture will just become a solid brick. So I don't have an ice cream maker so I thought if I just stirred it out of the freezer every once in awhile, that would work.

Well, I ended up with a solid brick. So I recommend an ice cream maker if you're following this recipe because the flavor is all there and is amazing but you need the machinery to make the texture right.

This recipe is from Joy the Baker's second cookbook, Homemade Decadence, which has an entire section devoted to delicious and unique ice cream flavors. Egg yolks and brown sugar are whisked together in a medium bowl. Pumpkin puree and all the flavors of fall (cinnamon, nutmeg, cloves and ginger) are cooked in a small saucepan to soften the pumpkin. These are both set aside.

In a medium saucepan, heavy cream and milk are heated together. You want the milk to be just under boiling point. The cream mixture is then poured through a mesh strainer. This step miffed me at first because we aren't making any berry ice cream so don't need to catch seeds. But when the milk and cream cook, you get some curdling and the strainer is to catch those cooked pieces so you have a nice creamy ice cream. So use the strainer.

Then pour the milk and cream mixture into the eggs and sugar mixture, whisking and stirring as you go. The last piece is mixing in the pumpkin with all those spices mixed in. Important: use your ice cream maker to complete this process, following its instructions. This most likely entails pouring in the maker, letting it circulate for a bit and then freezing overnight in a bowl before serving.

For a bonus, you can add some ginger snaps to it for some extra crunch or even stir in some chocolate chips. Confirmed: it tastes just like pumpkin pie.

Recipe
  • 1 cup pumpkin puree
  • 1 teaspoon cinnamon
  • 1 teaspoon ginger
  • 1/2 teaspoon nutmeg
  • 1/2 teaspoon allspice
  • 6 egg yolks
  • 3/4 cup brown sugar, packed
  • 2 cups heavy cream
  • 1 cup whole milk
  1. In a small saucepan, stir together the pumpkin puree and spices. Allow the pumpkin to start bubbling a little bit. Set aside.
  2. In a small bowl, whisk together the egg yolks and brown sugar. Also set aside.
  3. In a medium saucepan, combine the heavy cream and milk. Stir together over medium heat until just below boiling. The milk mixture will begin to steam.
  4. Pour the milk mixture through a strainer into a medium bowl. There will be some curds that are caught by the strainer, resulting in a spongy waste. You won't need this stuff.
  5. Allow the milk mixture to cool slightly before adding the egg-sugar mixture. Whisk to combine.
  6. Stir the pumpkin into the medium bowl and combine completely.
  7. Follow the instructions for your ice cream maker (likely something along the lines of adding the batter to the ice cream churner bowl, churn, freeze overnight etc.).
  8. You can add some crumbled ginger snaps or chocolate to this for extra decadence. Serve in abundance. 

Sunday, October 18, 2015

Kale and Sweet Potato Salad

Remember how I went through a phase of throwing everything together in a quinoa bowl? No? Well, I do! I was reminded of that habit while making this salad because I turned the salad into a wrap situation at times so it was like "whatever I can put in a quinoa bowl, I can also put into a wrap" epiphany.

As I've mentioned before, the dressing of the salads is not exactly my forte. Clearly I'm more attune to the ways of muffins and sugar and butter and not this green leafy stuff. But maybe, just maybe if I add enough other things to the mix, it will be okay.

 We're roasting sweet potatoes, carrots and chickpeas so we have a good mix of veggies for our salad. Although salads are usually cold, I actually enjoyed this with the warm vegetables. It also softens the cheese but more on that later. The vegetables are coated in olive oil and dusted with pepper before roasting to perfection. The same bowl is used to toss kale with some scallions and parsley to get a light coating of olive oil. Another dash of oil might be needed and then lemon juice. Quinoa is also cooking while all this dressing is happening.

In the end, the quinoa, cooked vegetables and some feta cheese are all mixed together with the kale. We have a nice balance of health here with the healthy grains, leafy greens and colorful veggies. At first, I ate this straight up and later decided it would make a good wrap filling so made some of those too. I even added some chicken to one variation and scrambled eggs to another, so many choices!

This is super easy to make-ahead of time so you have lunch for the week. It makes a good amount, probably 6-7 servings and you can double up on that salad dosage if you'd like.

Recipe
  • 4 cups of baby kale
  • 1 sweet potato, peeled and diced
  • 2 large carrots, peeled and diced
  • 1 can of chickpeas, drained and rinsed
  • 2 scallion stalks, chopped
  • 3 Tablespoons parsley, chopped
  • 1 cup quinoa, cooked
  • Feta cheese to serve
  • Olive oil for roasting veggies and dressing
  • Lemon juice for dressing
  • Pepper for seasoning 
  1. Preheat the oven to 350. In a large bowl, toss chopped sweet potato, carrots and chickpeas in some olive oil and pepper.
  2. Spread the vegetables across a baking sheet lined with aluminum foil. Roast until the carrots and sweet potatoes are soft.
  3. Meanwhile, cook 1 cup of quinoa according to instructions (basically 1:2 ratio of quinoa to water).
  4. In the same large bowl, combine the baby kale, chopped scallions and parsley. Toss to combine and drizzle with olive oil and lemon juice.
  5.  Once the quinoa and vegetables are cooked, toss together with the greens and top with feta.
  6. Serve in a bowl or add to a wrap. You can add some chicken or eggs to make it a breakfast burrito (highly recommended).

Thursday, October 15, 2015

Angel Food Cupcakes with Devil Frosting

There have been a lot of muffins up in here. Time to mix it up! My coworker returned from maternity leave last week and we're super excited to have her back so decorated her office and wanted to bring in her favorite treats. So naturally, none of us were certain what her favorite treat was so we asked her husband (because yes, we have his number too).

The choices given were angel food cake with dark chocolate frosting, strawberry shortcake or creme brulee. Needless to say, angel food cake was the winner. Especially since I don't own a torch nor do I think I should try to improvise that. Although I did find some strawberry shortcake cookie recipes. But alas, fluffy cupcakes it is!

I tried making angel food cake once before and while it tasted great, the consistency was a little dense. This was in part due to the difficulty I had getting the cake out of the ungreased pan. But since that was the main pitfall, I decided cupcakes would be safe in their individually wrapped-ness.

Otherwise, I followed the instructions to a t. Lots of egg whites? Check. Process my refined sugar? No problem. Cake flour? Okay, I did some Googling to see if I actually needed cake flour. Yes, you need cake flour to make this a light texture. Somethin' somethin' about the protein content.

Egg whites are beaten before mixing the sugar in and forming medium peaks. I prefer to call these mild peaks because what is medium? Mild just means we're part-way there. Medium speed. As the dry ingredients are slowly added, the batter is growing. Like actually expanding. Ultimately, you want it to hold its own shape so if you drag a spoon through it, you are parting the batter sea and it's not filling up the divet you just made.

I used an ice cream scoop to spoon the batter into the cupcake tin. The batter keeps its shape in the bowl and I filled the liners up almost to the top so I had some space for the frosting later. These cupcakes will get fluffy but don't expand much. In fact, the wrappers actually shrink to the cake so they're super easy to get out of the pan.

I made the cupcakes ahead of time, saved them for a day and then frosted them with a dark chocolate ganache just before serving. The ganache is straight up cream and dark chocolate, melted together to perfection. Yes, you can also eat it straight.

So with the fluffiness of angel food and the decadence of the dark chocolate, I think these two elements cancel each other out. Does that make them Earth cupcakes? Let's just stick with delicious.


Recipe
Cupcakes
  • 3/4 cup + 2 Tablespoons granulated sugar
  • 1/2 cup cake flour
  • 1/4 teaspoon salt
  • 6 egg whites, at room temperature 
  • 2 1/2 Tablespoons warm water
  • 1/2 teaspoon vanilla extract
  • 3/4 teaspoon cream of tartar
  1. Preheat the oven to 350 and line a cupcake pan with liners.
  2. In a food processor, pulse the sugar until very fine.
  3. In a small bowl, combine half of the sugar with all of the cake flour and salt.
  4. In a large bowl, combine the egg whites, water, vanilla extract and cream of tartar. Whisk together until combined.
  5. Switching to a hand mixer, beat the egg mixture while adding the reserved half of the sugar. Continue mixing until medium (mild) peaks form.
  6. Set aside the hand mixer and dust the egg mixture with the flour mix, folding in with a rubber spatula. Repeat until all of the flour mixture has been incorporated. 
  7. Scoop the batter into the prepared pan and bake for about 20 minutes or until golden brown.
  8. Allow to cool completely before frosting.
Frosting
  • 1/2 cup heavy cream
  • 3/4 cup dark chocolate chips
  1. In heat proof bowl or double boiler, combine the cream and chocolate set over a pan of water.
  2. Heat the water and stir the cream and chocolate until it begins to melt together
  3. If your mix comes out too liquidy, add more chocolate. If it's too thick, add more cream. 
  4. Once the mixture is completely combined, remove from heat.
  5. Allow to cool before frosting the cupcakes.

Monday, October 12, 2015

Maple Walnut Muffins

I had every intention of taking a step back from fall things and making banana muffins. The bananas, however, had other plans. I really thought I could just freeze the bananas and then thaw them and they'd be okay. Falsehoods. They got really syrupy and rotten and gross. Plan B: maple walnut muffins. Much more seasonally appropriate and not squishy.

People wonder why I bake all the time or how I find the time and honestly, it's hard sometimes to carve out time so I'm not rushing through a recipe. But I find baking very cathartic. I can just listen to music and mix together ingredients, making a creamy batter that will become a delicious muffin or donuts or cake. And then I get to relax and listen to music while everything's in the oven, it's like 'me time'. Not that I really need to carve out me time, my life is basically my time at this point.

 
 These muffins were a little more intensive because they have a topping. I opted out of the suggested icing though. I know that muffins are really just cupcakes that are acceptable for breakfast but the topping seemed sufficient. I do have a pretty difficult time making the topping crumbly enough but if you too have this struggle, just make sure you have a chunk of butter in there and it will melt and cook up just right.

 
I typically try to position my baked goods with some healthy twist like telling my coworkers that there's Greek yogurt in there or not that much butter etc. I pretend that will make people eat them up faster. Recently, one of them pointed out that they would eat them regardless of how healthy I try to make them sound. But these muffins have oats! And they have Greek yogurt! And really the only butter is in the topping! Look at all the healthy things! Eat the muffins...

 
Recipe

Muffins
  • 1 3/4 cup of flour
  • 1 cup rolled oats, run through a food processor
  • 3 teaspoons baking powder
  • 1/2 teaspoon cinnamon
  • 3/4 cup packed brown sugar
  • 2 large eggs
  • 1 cup of milk
  • 1/3 cup vegetable oil
  • 1/4 cup Greek yogurt
  • 1 Tablespoon maple syrup (or extract, if you have it)
  • 1 cup walnut pieces
  1. Preheat oven to 400 degrees and line a muffin tin with liners (or spray with non-stick).
  2. In a medium bowl, combine the flours, processed oats, baking powder and cinnamon.
  3. In a large bowl, whisk together the sugar, eggs, milk, oil, yogurt and maple syrup.
  4. Stir in the dry ingredients in with the eggs mixture.
  5. Fold in the walnuts.
  6. Fill each muffin liner 3/4 full and top with the topping. 
  7. Bake for 30 minutes or until cooked through.
Topping
  • 2 Tablespoons cold butter
  • 1/4 cup brown sugar
  • 2 Tablespoons flour
  • 2 Tablespoons rolled oats
  1. In a small bowl, combine the sugar, flour and oats.
  2. Cut in the cold butter with a knife or pastry cutter.
  3. Sprinkle on top of muffin batter in the pan. 

Monday, October 5, 2015

Pumpkin Muffins

We are taking this fall situation head on. I personally would like a giant pile of leaves to jump into. Kthnx.

While pumpkin spice lattes (and everything else) have been around for a few weeks now, I hadn't cracked open a can of pumpkin until this past week. And it's gonna be all downhill pumpkin from here! This recipe only required half a can of pumpkin, so I used the other half to make some pumpkin chili (pardon the ancient and terrible photos that went with this post, I was young).

Muffin Mondays are gaining popularity at the office so after last week's zucchini muffins, I took a poll on just how ready for fall people were. Would they prefer banana (no fall for me, please), apple (okay, I know, we're getting there) or pumpkin (wooo!! It's fall!!!!!)? The resounding winner was pumpkin. I also made these during the blood-moon eclipse so maybe they should be called Lunar Muffins...

For good measure, I threw some chocolate chips into half the batch because chocolate chip pumpkin anything is a great idea. Cookies, bread, muffins, you get the idea. We do the thing where we separate our dry and wet ingredients. I used the spices that smell like fall baking. No joke, I woke up the other morning smelling apple pie in the oven. It was a lie but it stuck with me.

I love the color of pumpkin, the burnt orange of the filling makes me feel all the warm fuzzies. The flour mixture is slowly poured into the wet ingredients and stirred gently until everything is combined. I like that for muffins, I can just use a good old fashioned wooden spoon and don't have to use a hand mixer. It helps that the butter was melted for this recipe.

I think there's some serious potential for cupcake liner companies to make a liner that has a 'fill here' line. Sometimes you get too much and they overflow (not a bad thing, necessarily) or you put too little and then you have a sunken cupcake/muffin. I know the expansion rates of the batter will vary by recipe but ya know, ball park estimate.

At any rate, I filled these about 3/4 of the way full and baked for 30 minutes or so. While the first batch baked, I sprinkled chocolate chips into the remaining batter. Great plan. All in all, there were 18 muffins out of all of this.

Let's keep the trend alive, more muffins next week!

Recipe
From Joy of Cooking

  • 2 cups all-purpose flour
  • 1 Tablespoon baking powder
  • 1/2 teaspoon salt
  • 1 teaspoon nutmeg
  • 1 teaspoon cinnamon
  • 2 eggs
  • 1 cup milk
  • 1 cup pumpkin puree 
  • 1 cup brown sugar
  • 1 stick unsalted butter, melted
  • 1 teaspoon vanilla
  • Sprinkling of chocolate chips
  1. Preheat the oven to 400 and line a muffin tin with liners (or spray with non-stick spray)
  2. In a medium bowl, combine the dry ingredients (flour, baking powder, salt, nutmeg, maybe some cinnamon if you'd like).
  3. In a large bowl, whisk together the sugar, eggs, milk, vanilla, pumpkin and melted butter. 
  4. Once the wet ingredients are thoroughly combined, pour the dry ingredients into the wet while stirring gently.
  5. Using a wooden spoon (or other stirring utensil), stir the wet and dry ingredients together until fully combined.
  6. If you'd like, add the chocolate chips (or nuts) and fold into the batter.
  7. Pour the batter into the muffin liners, filling 3/4 of the way full.
  8. Bake for 30  minutes or until firm.