Sunday, December 28, 2014

Chocolate Peppermint Pie

Since starting this blog, I've created a new motto: never show up empty handed. Even with my own family, never show up empty handed. So when I arrived a few days before Christmas, I had in hand a chocolate pudding pie.

I tried to make a pudding pie once a couple years ago and my downfall was certainly not allowing enough time for it to set. This time, the pie had an overnight stay in the fridge to set. Chocolate graham crackers were pulverized and mixed with butter to make the crust. I used a springform pan for this but you could also use a pie pan if you don't have one.


The pudding mixture is made in a saucepan by combining whole milk, corn starch, sugar, butter and two kinds of chocolate. The mixture will thicken as it cools at which point you can spread it out in the crust. For me, I stopped here and saved the topping for just before serving.

Heavy whipping cream is aptly named. If you take a hand mixer to it, it thickens up into a tasty whipped topping and if you keep going, I believe you will get some fresh butter. This whipped topping had some sugar and peppermint extract added to it. Once it was thick enough and stiff, I added it to the spring form pan pie and spread it out nice and evenly. Topped with crushed candy canes and red sprinkles, it was quite festive.

I let the pie set while we ate dinner and the spring rim came off perfectly. The first slice of pie was hard to get out as you have to cut through the cookie crust. But after that initial piece, it's easy as--well, pie.

This could be adapted to be a real New Year's pie (as opposed to the one I tried to make once upon a time). I like peppermint for the holidays but not too much as some people aren't a fan. This offers a nice hint of mint and chocolate together in a heavenly combination.

 
 Recipe

Crust
  • 9 ounces of chocolate graham crackers (2 packages)
  • 1 stick of unsalted butter, melted
  • 1/4 cup of granulated sugar
Filling
  • 2 cups of whole milk
  • 4 large egg yolks
  • 1/2 cup granulated sugar
  • 3 Tablespoons cornstarch
  • 1/4 teaspoon salt
  • 6 ounces semi-sweet chocolate
  • 2 ounces mint flavored chocolate (such as Andes)
  • 2 Tablespoons unsalted butter
Topping
  • 2 cups heavy cream
  • 2 Tablespoons confectioner's sugar
  • 1 Tablespoon peppermint extract
  1. In a food processor, pulse the chocolate graham crackers until you have fine crumbs. Add the sugar and pulse once or twice more.
  2. Add the melted butter to the graham cracker crumbs. Press the mixture into a spring-form pan or pie pan that has been sprayed with non-stick spray.
  3. Bake the crust in a 375 degree oven for 15 minutes.
  4. While the crust is baking, heat the milk in a medium sauce pan until it comes to a simmer. 
  5. Remove the milk from heat and whisk in the egg yolks, sugar, cornstarch and salt.
  6. Return the sauce pan to heat and bring to a rolling boil, whisking constantly.
  7. Once the mixture boils, whisk in the semi-sweet and mint chocolate. You can return the pan to a low heat if the chocolate isn't mixing well.
  8. Allow the  mixture to thicken away from heat before pouring into the prepared crust.
  9. Place the pan with crust and filling in the fridge for at least an hour but until set. I recommend leaving it overnight
  10. About 30-40 minutes before serving, whisk the heavy cream, peppermint and sugar together with a hand mixer. Mix until the cream thickens and becomes like whipped cream.
  11. Spread the whipped topping over the set chocolate pudding pie. You can top this with sprinkles or crushed candy canes.
  12. Allow the pie to set with the whipped topping for half an hour before removing the spring form rim (if using a spring form pan).

Wednesday, December 24, 2014

Traditional Trash Party Mix

It took me a long time to understand some of the stories my grandmother told me. For example, she was not the original Kilroy, she just went by that name when she made art. And she didn't invent paper mache, she just made what she called 'rustiques' which were somewhat mache-ed fruits on pieces of drift wood that she sometimes sold. And eventually I learned that when she was offering me trash, she was offering me a delicious party snack and not actual garbage.


Trash has become a Christmas staple in our family with jars of all sizes arriving in the weeks leading up to Christmas. I have distinct memories of her leaning over the oven to stir a turkey pan filled with trash. When people talk about Chex Mix party mix, I think of Trash and how it's far superior. Chex Mix will do in a pinch but if you want the good stuff, head to the Trash.

Like most good recipes, this one is based on taste and improvisation, something I'm not so familiar with in the kitchen. Baking requires a somewhat precise hand whereas Trash requires a dash of this, a pour of that, a craving for another this. You can make it whatever you want, really.

 
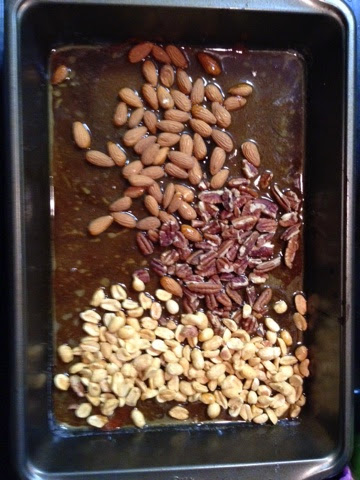
My version of trash had the traditional rice squares (aka: Chex), pretzels and peanuts but I also added walnuts, pecans and stuffed pretzels. I bet bacon cheddar pretzels would be heavenly in this but I tried using mustard ones instead. Melted butter mixed with some soy sauce and Worcestershire sauce form the base with which to coat all the munchies. For that extra kick, I added a squirt of sriracha sauce. Plus, it's the end of 2014, Year of Sriracha.

All of the ingredients are left to soak up the spices and oils. Every 20 minutes or so, you can stir everything around to make sure each bite is soaking up the goodness. Once things are crunchy and don't appear squishy, you're ready to dive in. If there's too much marinade, you can always add more munchies, especially oat or rice squares since they'll soak up the most juice.

 
It seems like this was a success given the lack of leftovers. It has more flavoring and custom touches than just a bag of pre-made mix. But then again, homemade always does!

What are some of your holiday baking/cooking traditions? Even if it's Chinese food and a matinee movie, traditions are traditions.

 
Christmas Trash
  • 2 Tablespoons of butter
  • 1/4 cup of Worcestershire sauce
  • 3 Tablespoons soy sauce
  • Splash of sriracha
  • 2 cups of mixed nuts
  • 1 cup of pretzels
  • 1 cup of stuffed pretzels
  • 2 cups of rice square cereal
Note: You can change the quantities of munchies to your liking and swap out for other items

  1. Preheat the oven to 250. In a 9x13 baking pan, melt the butter.
  2. Once the butter is melted, add the Worcestershire sauce, soy sauce and sriracha as well as any other desired spices. Mix together.
  3. Pour the nuts, pretzels and cereal (or any other munchies) into the pan. Stir to coat with the spice sauce.
  4. Bake in the oven for 20 minute intervals. After 20 minutes, carefully stir and return to the oven.
  5. Continue baking until the sauce is baked into the munchies and they appear crunchy. 
  6. Trash can be stored in jars and shared as holiday gifts or served in a bowl at a party. 


Monday, December 22, 2014

Vegan Thumbprint Cookies

These days, I find it harder and harder to bring baked goods to the office that everyone can enjoy. With some coworkers being gluten free and others being vegan, it can be hard to balance all of the dietary restrictions. With my team's holiday party coming up, I wanted to make treats that everyone could enjoy.

While I've made vegan cupcakes before, I found it rather difficult to find a vegan cookie recipe. Finally, after about a half hour of internet searches and cookbook consulting, I finally found a winner: something that was vegan and could be made with things already in my pantry. Note that this is not actually gluten free though.

 
Almonds are coarsely ground in a food processor to make a chunky almond flour. Next, oats are also pulverized and mixed with the almonds a dose of flour. Canola oil and maple syrup are used to combine the dry ingredients. Since we're using oats, they will soak up additional water as you let the mixture set. I was happy that this recipe used up the last of my bottle of oil and maple syrup so it felt like I was making extra space in my pantry.

 
Forming balls of dough, you can make a dent in the center for the 'thumbprint' portion. The cookies are a little crumbly so may crack or come apart but can be easily pressed back together. The cookies are baked for 15-20 minutes with jam filled centers. Also make sure the jam is vegan.

The cookies tasted pretty healthy without butter or eggs in them. I was pretty proud that they turned out well and accommodated my vegan friend. Unfortunately, I didn't know that he also had a nut allergy. You can't win 'em all!


Recipe
adapted from Shutterbean

  • 2 cups whole almonds
  • 4 cups quick-cooking oats
  • 1/4 teaspoon salt
  • 1 1/2 cups of flour, divided
  • 1 cup canola oil
  • 1 cup maple syrup
  • Jam of choice
  1. Line a baking sheet with parchment paper and set aside. Preheat the oven to 350. 
  2. Using a food processor, pulse the almonds until they are coarsely chopped. You don't need to make it as fine as flour but the larger the chunks are, the more difficult it will be for the cookies to stay together.
  3. Place the ground almonds in a medium bowl. Now pulse the oats in batches in the food processor with the salt. 
  4. Combine the almonds, oats, and 1 1/4 cups of flour together in the medium bowl.
  5. Next, gently stir in the canola oil and maple syrup until well combined.
  6. Allow the mixture to stand for 10-15 minutes. If it is too runny, you can gradually add the remaining 1/4 cup of flour.
  7. Form the dough into small ball the size of an apricot. I used a small melon baller for this. Place the cookies on the baking sheet lined with parchment.
  8. Gently bore a small whole into the center of the cookies. I used the end of a spoon for this and also gently flattened the cookies slightly.
  9. Fill the holes with your jam of choice. 
  10. Bake the cookies for 15 minutes or until golden brown.
  11. Allow the cookies to cool before serving or packaging for gifts. 

Wednesday, December 17, 2014

Classic Cookie Cutter Cookies

Last week, we focused on truffles. This week, it's looking like cookies are the golden ticket. When I was a kid, we always made cookie cutter sugar cookies at Christmas. We had a big tin full of different shapes and it was always such a struggle to decide which ones to make! A sheet of camels, a row of angels, the big Christmas tree or the miniature one. So many choices for a kid to make. I was primarily responsible for punching out shapes while my mom made and rolled out the dough. I always wanted to make more and more cookies and would get frustrated when the dough would stick or my shapes would get ruined trying to pull them off the cutting board.

I feel like it's a frequent issue to have trouble making Christmas cookies. I've tested a few recipes, including store bought dough, to try and find an easy to make and easy to roll dough. This recipe comes from a magazine tear-out from last year's holiday specials. While it didn't go perfectly, keep your cool and all will be well.

The dough can be made ahead of time so I made it a day in advance so there was ample time to chill the dough. I actually ended up freezing half of it for when we get closer to Christmas day so I can make cookies again, without the work of making dough. Even though it was meant to chill, I was skeptical of this dough because it came out very crumbly.

I told myself that compressing the dough in plastic wrap and chilling it would magically make it solid. Of course that didn't work. When I went to take the dough out in pieces to roll out, it just crumbled in my hands. No matter how much I tried to fuse the butter and sugar and flour together between my hands, it just wasn't having it. So I added a little water. Yes, it made the dough sticky and yes that required extra flouring of the rolling pin and board but it worked! Christmas is saved!


Whereas my mom still has an abundance of cookie cutters, I have three holiday shapes (a tree, a gingerbread man, and a snowflake) and three Star Wars shapes (Yoda, R2D2 and Darth Vader). If you turn Yoda vertical and pinch his ears a little bit, he looks like an ornament. And Darth Vader could easily be a bell. R2 is just R2 though.

My other struggle with cookies (and cupcakes) is finding the right kind of icing. I want the icing that dries quickly so I can stack the cookies. I want icing that doesn't get sticky or too soupy. Once more, after many experiments, I have found royal icing to be the best choice. It's a snap to make, just powdered sugar, vanilla and egg whites, and you can add food coloring to make whatever designs you please. And best of all, it does in fact dry so you don't get squishy cookies.

More cookies happened this week and I'm sure you all have had your fill of pot lucks, cookie swaps and holiday parties but I find baking and decorating with friends and family is a great way to spend time together. And really, that's what it's all about.

Recipes
Cookies-dough will need to chill for at least 2 hours before rolling
  •  3/4 teaspoon salt
  • 1/2 teaspoon baking powder
  • 3 cups of flour
  • 2 1/2 sticks of unsalted butter, chilled and cut into 1/2 inch pieces
  • 1 cup of sugar
  • 1 large egg
  • 1 egg yolk
  • 1 teaspoon vanilla extract 
  1. In a medium bowl, combine the salt, baking powder, and flour. Mix well to incorporate.
  2. In a large bowl, combine the sugar and cubes of butter. Using a hand or stand mixer, mix the ingredients until it's coarsely combined. It doesn't need to be smooth or creamy.
  3. Add the egg, yolk and vanilla to the butter mixture. Use an electric mixer to combine.
  4. Gradually add the dry ingredients to the mix.
  5. Once everything is combined, divide the dough in half and wrap in plastic wrap to create two 1 to 1 1/2 inch thick discs. If the dough is crumbly, add small amounts of water until it stays together.
  6. Allow the dough to chill for at least two hours. You can also freeze the dough for up to a month.
  7. Once the dough is ready, preheat the oven to 325 and line two baking sheets with parchment paper.
  8. From the chilled dough, break of a segment and roll out on a generously floured surface. Also flour the top of the dough or rolling pin to prevent the dough from sticking.
  9. Punch out your cookie shapes and place on the parchment paper. These won't spread much so you can put multiple cookies close together.
  10. Bake the cookies for 10-15 minutes or until lightly golden.
  11. Allow cookies to completely cool before frosting. Or eat plain and warm. 
Royal Icing
  •  3 1/4 cups powdered sugar
  • 2 large egg whites 
  1. In a medium bowl, combine the powdered sugar and egg whites. 
  2. Mix together until you create a smooth frosting. You can use a hand mixer, whisk or even a spoon.
  3. If you want other colors, add 3-4 drops of food coloring. 
  4. Use a butter knife or pipette to decorate cookies. The frosting will dry in a few minutes so you can stack cookies together. 

Friday, December 12, 2014

Peppermint Chocolate Truffles

Chocolate is always on the menu. And if it isn't on your menu normally, it should be during the holidays. Stuff your face, stuff your friends' faces, chocolate for everyone! White chocolate is a little rich so not everyone is a fan (yup, referring to the egg nog truffles from earlier in the week). So of course I also made dark chocolate ones too.


For an added pep and holiday spirit, you can add peppermint extract to the truffle dough. You can also flavor them with another extract if you prefer, there is quite a variety of oils available. Similar to the egg nog truffles, chocolate, cream, and butter are melted together. Once everything is smooth, you can add the peppermint extract and allow the mixture to set in the fridge.

 
Once the dough is ready, melt even more chocolate and dip the dough in the melted goodness. If you have some holiday angst or stress, take a mallet to some candy canes to make peppermint toppings for the truffles. Otherwise, you can use the food processor or sprinkles.

Just remember, nothing is perfect and the truffles don't have to look perfectly smooth or Pinterest worthy. Just look at these splendid examples of Pinterest failures. And this clip from Meet the Robinsons where failure is celebrated with great enthusiasm.


Enjoy the weekend, decorate your tree, make some truffles and drink some egg nog! Holiday parties are among us in full force but don't let that get you down, embrace the cheer!

Recipe
  • 6 oz semi-sweet chocolate
  • 1/2 cup heavy cream
  • 2 Tablespoons unsalted butter, room temperature
  • 1/2 teaspoon peppermint extract
  • 3-4 candy canes
  • 12 oz semi-sweet chocolate (or white chocolate if you prefer)
  1. In a small saucepan, heat the heavy cream until it begins to bubble.
  2. Combine the 6 ounces of chocolate, warm butter, and hot cream in a bowl. Gently stir until the chocolate is melted.
  3. Stir in the peppermint extract.
  4. Cover the mixture with plastic wrap pressed against the surface of the dough. Allow to chill in the fridge for 1-2 hours.
  5. While the dough chills, crush 3-4 candy canes for decoration, if desired. 
  6. Once the dough is set, use a spoon or melon baller to form small truffle balls. 
  7. Melt the remaining chocolate in a double boiler or the microwave.
  8. Dip the truffle balls into the melted chocolate and place on a tray lined with wax paper.
  9. Sprinkle with crushed candy canes or sprinkles. 
  10. You can store truffles in an airtight container for up to one week. 

Tuesday, December 9, 2014

Egg Nog Truffles

This evening was the first official snow. I know it's snowed before but this was the first perfect snow: during the holidays, light flurries, complete with holiday lights. Except for my holiday lights because they blew a fuse and after searching the house and finding every other fuse for every other string of lights I own, ceased to find the one I was looking for. Typical.

One of my favorite holiday treats is egg nog. Even if you can buy it in October now, it's perfect for the holidays. A lot of people haven't had egg nog before (whaaaat??) or don't like it (whaaaaaaaaaaat???). These truffles are extremely rich, white chocolate will do that to ya.

I'm sure every one's busy with holiday prep and parties. There are plenty of options to bring to the hostess, even if they have the mostest. Truffles are easy to make but have the thoughtfulness of being homemade. Later this week, I'll have more truffle options but in the meantime, egg nog truffles for the win!

In a small saucepan, heat the egg nog until it is bubbling. The hot egg nog is poured over white chocolate and butter to melt everything together. It's best to mix everything in a microwavable bowl in case not everything melts at once. A sprinkle of nutmeg adds the perfect touch to the dough. Cover the mix with plastic wrap, pressed against the mixture to prevent bubbles.

After the dough has chilled, 1-2 hours, you can use a melon baller to scoop out tablespoon sized amounts. Carefully roll the dough into balls and dip in melted white chocolate. Top with a little more egg nog, or festive sprinkles, and allow to set. I found it best to put the truffles back in the fridge to set before wrapping up to ensure they wouldn't melt.


This is totally my Yankee swap gift, don't tell my coworkers.

Recipe

  • 1/3 cup of egg nog
  • 2 12 ounce bag of white chocolate, one at a time
  • 4 Tablespoons of unsalted butter, room temperature 
  • 1/4 teaspoon of nutmeg
  • Pinch of salt
  1. In a small saucepan, heat the egg nog until it boils a bit.
  2. Meanwhile, combine 1 bag of white chocolate, salt, butter and nutmeg in a heatproof bowl.
  3. Once the egg nog is ready, carefully pour over the chocolate mixture. Allow everything to melt together until smooth.
  4. Place plastic wrap against the chocolate mix and allow to chill in the fridge for 1-2 hours.
  5. When the dough is almost ready, melt the second bag of chocolate for dipping the truffles.
  6. Once the dough is set, scoop the truffles into bite size truffles. Carefully dip the truffles into the chocolate until covered. Place the completed truffles onto wax paper to set.
  7. Sprinkle with nutmeg or sprinkles for added festiveness. 

Tuesday, December 2, 2014

Lessons in Pie Making

I have eaten a lot of pie, like a loooot of pie over the past week. Between Thanksgiving, Friendsgiving and pie-eating contests, all of the pie has been made and consumed. This was the first year I attempted to make pie crust from scratch and in retrospect, it could have gone better. Here are the key lessons I learned about making pies.

1. Start Early- Pies take time, love and attention. Starting to bake pies at 9 o'clock at night is not a good idea. You have to make the dough, let the dough set, then roll out the dough, let the dough set. Then bake the crust for a bit before adding the filling. And THEN you have to actually bake the pie. This puts you at roughly midnight and chances are you forgot something in the process.

2. Line Your Pan- This was the first time I used pie weights. The idea is, when you pre-bake the crust to make it nice and golden, the weights prevent the crust from bubbling. The first pie I made, I just put the weights directly in the pan. The weights are durable and reusable but they also will bake slightly into the crust if you don't put foil under them. I learned this the hard way as my weights baked into the crust.

3. Don't Turn Your Crust Upside Down- Based on #2, my way of getting the pie weights out of the pie crust was to dump them into a bowl. This was great until some of the pie weights got stuck and knowing they were hot, I continued to try and shake them loose. Wrong plan. The entire pie crust fell out of the pan, folded on itself and landed in a buttery mess, pie weights and all. There was definitely a scream. Definitely a yell of horror and definitely a scramble to put the crust back together and burn my fingers to get the rest of the weights out. 

4. Triple Quadruple Check- This rule applies to checking for pie weights in your crust and reading the recipes. I realized when I finished at about midnight that I had forgotten a key ingredient to pumpkin pie. The milk. This isn't like forgetting vanilla, it's the main wet ingredient. Again, this elicited a yell and maybe some swearing. Okay, definitely some swearing. 


5. Get a Poker Face- Yes, I was worried I left a pie weight in the pecan pie. I'm waiting for someone to crack a tooth. Dear lord, please don't crack a tooth. I will never, ever live this down. Emily the blogger my butt! And maybe they won't notice the pumpkin pie tastes strange. Maybe I can pretend I need a picture and pre-taste the pie. They won't care that one slice is missing. Which is worse: hearing about how you couldn't wait to eat the pie or hearing about how you forgot the milk for the rest of your life?!

6. Have a Backup Plan- You can bet your B that I packed extra butter and pumpkin in case the taste test in #5 failed. I can't be responsible for a lack of dessert at THANKSGIVING!! Another great backup plan would have been to a) have all the real ingredients for pumpkin pie before 9pm and b) have store-bought crusts as back-ups in the first place.

Why is it so much more stressful to bake for family? I bake for strangers and the interwebs all the time but I just can't fake it for the fam. I think I just get stressed and then I mess up and then my stress is validated by messing something up. It's a vicious cycle. Of pie doom, vicious cycle of pie doooom.

Thursday, November 27, 2014

Pecan Pie Bars

We're in crunch mode: Thanksgiving dinner is hours away and if you're like me, pie making is scary business. But I'm here to reassure you, it's going to be okay. Because if all else fails, just make the filling in all its perfection and just dump it into a simple shortbread crust. Then you can have pie bars instead of just pie. 

These were originally for a potluck at work where it's much easier to do a grab and go system than slice up a pie. Personally, I ate about six of these because they're buttery and full of chocolaty goodness. And as we've established, I'm now a pecan convert as opposed to my previous pecan't view. I'm using this filling for pecan pie today but in light of my pie failures (another post, another time), kinda wishing I had made these instead.

The shortbread crust is very simple to make, Mixing lots of butter (don't tell anyone before they eat, it's worth it), flour and powder sugar, we make a doughy mixture. This is then dumped into your pan and pressed out flat and even. The crust is pre-baked for 10-15 minutes while preparing the filling.

The filling will be extremely gooey which is why it's important to have your crust even. Eggs, corn syrup, sugar, butter and vanilla are all mixed together before adding the pecans and chocolate. Everything is folded together so you get chocolate and pecans in every bite. 

Once the crust is ready, pour the filling into the pan. Bake until the mixture is set and allow to completely cool before cutting into squares. This filling can also serve as your pecan pie filling with a shortbread crust, store bought crust or if you're daring, homemade crust (adventures for another post).

Thank you for reading and I hope you and yours have a very happy Thanksgiving!!!

Recipe
adapted from Joy the Baker's recipe in Homemade Decadence*

Crust

  • 1 cup (2 sticks) unsalted butter, softened
  • 2 cups all-purpose flour
  • 1/2 cup of confectioners sugar
Filling
  • 3 eggs
  • 1 cup of corn syrup
  • 3/4 cup of granulated sugar
  • 3 Tablespoons unsalted butter, melted
  • 1 teaspoon vanilla
  • 2 cups chopped pecans
  • 1 cup of chocolate chunks

*and by adapted I mean trying to write this from memory

  1. Prepare a 9x13 inch pan by spraying with non-stick spray, lining with parchment paper and spraying the paper with non-stick spray. Preheat the oven to 350. 
  2. In a large bowl, combine the softened butter, flour and powdered sugar until well combined. 
  3. Dump the crust dough into the prepared pan and press out until the crust is evenly distributed in the pan.
  4. Bake the crust for 10-15 minutes until slightly golden brown. 
  5. For the filling, whisk together the eggs, corn syrup, sugar, melted butter and vanilla. Mix until combined.
  6. Fold in the pecans and chocolate chunks. 
  7. Pour the filling mixture into the baked crust. The mixture will spread out completely so it's important that the shortbread crust covers the entire pan.
  8. Bake the bars for 30-45 minutes until the filling is set. 
  9. Allow the pan to cool completely before cutting the bars into squares. 
  10. You can make this recipe gluten free by substituting the all-purpose flour for nut flour or you can create a section with no shortbread, only filling, but it will be a little messier to eat. 


Thursday, November 20, 2014

Stuffed Acorn Squash

I'm pretty sure that at 25, I know what I like (and don't like) to eat. I know for a solid fact that brusselsprouts and asparagus are bitter and gross to me. However, I will concede that other vegetables have grown on me. My mom use to say "you'll love these when you're older" which I thought was silly because why would she give me brusselsprouts nooow when I wouldn't love them until laaater? Needless suffering.


One thing that I have grown to love is squash. Butternut squash is the star of the squash family but we mustn't forget about its shorter cousin, acorn squash. My mom would make this dish with nuts and spices filling the hollowed out acorn. Granted, at the time, I really only liked the brown sugar smothered parts of the squash and not the squash itself. Acorn squash also make a lovely addition to a Thanksgiving centerpiece, plain or painted.

For our purposes though, we'll eat them. The acorn squash are sliced open so their seeds can be scraped out, much like a pumpkin. I also cut out some of the squash to make more room for the nut mixture. I recommend slicing off a small piece of the bottom of the squash so they sit flat. This is not something I did but regret. In a 350 degree oven, the hollowed vegetables are lightly drizzled with oil and placed face down on a baking sheet to roast. This takes about 20-30 minutes which is plenty of time to make the stuffing.


In a small bowl, oats, raisins, brown sugar, pecans and all-spice are mixed together. You can really make whatever combination you want for the stuffing. I basically made some loaded oatmeal. Once the squash is roasted, they are each stuffed with as much goodness as possible and then topped with a slice of butter. It's just enough butter to drench the brown sugar and oats but not enough to negate the healthy factor of squash.


The acorn squash are now returned, upright in a ramekin dish or upright on the baking dish, to complete cooking. I found another 15 minutes in the oven did the trick. These guys will be hot hot hot when you take them out of the oven so allow to cool for a few minutes before serving to guests (or yourself).


Recipe
  • 2 medium acorn squashes
  • Olive oil
  • 1/4 cup of brown sugar
  • 1/4 cup of uncooked oats
  • 1/2 cup of pecans (or desired nut)
  • 1/4 cup of raisins
  • Dash of all-spice (or cinnamon or cloves etc.)
  1. Preheat the oven to 350. Line a baking sheet with parchment paper and set aside.
  2. Cut the tops off the acorn squashes, not quite in half but enough to expose part of the hollow center. Also cut a small portion off the narrow bottom of the squash so they can stand flat.
  3. Using a spoon, remove the seeds and threads of the squash. We want there to be enough room to add the oat-nut mixture later.
  4.  Brush the exposed areas of the squash with olive oil before placing face down on the parchment paper-lined baking sheet.
  5. Roast the squash for 20-30 minutes until the insides looks brighter and the outside looks dark and oiled.
  6. Combine the brown sugar, oats, nuts, raisins and spices in a bowl. Mix well so you get a little bit of everything in each bite.
  7. Once the squash is ready, remove from the oven and place face up in the ramekin dishes (or on the parchment). Stuff with the nut mixture. 
  8. If using the ramekins, place them back on the baking sheet for cooking.
  9. Top with 1/2 a teaspoon (normal slice) of butter.
  10. Place the dishes/squash back in the oven and allow to finish cooking for another 15 minutes. 
  11. Remove from the oven and allow to cool before digging in.

Tuesday, November 18, 2014

Simple Applesauce

When I was a kid, my grandparents lived out in California. What was once their neighborhood is now the headquarters of Apple, for geographic reference. In their backyard was an apple tree which I always thought was strange since apples seem more of an East Coast treasure whereas citrus fruits would be something I'd expect from California. Since they ended up with an abundance of apples, my grandmother would make applesauce each year.

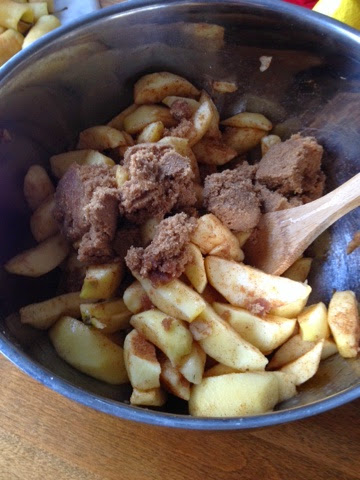
Although I wasn't there annually for this treat, I decided to make some applesauce with the last round of apples from my apple picking adventures. I used a recipe from the Pioneer Woman to start and found out it's amazingly simple to make applesauce. Once the apples are peeled and cored (no washing! Yeeeeess), they are tossed in a bowl with some cinnamon and allspice. You can skip the allspice if you want or even substitute for nutmeg or cloves.

I added a squeeze of lemon juice and a hefty dose of brown sugar. I'm a brown sugar fiend and would happily snack on the hardened pieces that don't quite break apart. All of this goodness is mixed together before being added to a pot with some apple cider (or apple juice if you prefer). Everything is left to heat up and cook down. The apples will release some of their own juices so don't worry about the liquid volume.

Once the apples were nice and tender, I set aside some baked apples for ice cream topping. The rest were pureed with an immersion blender and tada! Applesauce. I fully intend to eat this applesauce by the spoonful in large quantities but it would pair well with ice cream, pork chops, latkes or used in baking instead of butter. I think there's a way you can do that.

As we round out the pumpkin/apple season, we're off to squash and then cookies and egg nog. I'm pretty pumped and even though egg nog is currently available in the grocery store, I'm holding off until my house smells like trees.

Recipe
adapted from The Pioneer Woman (makes about 4-5 mason jars)
  • 12 small apples (or 6-8 regular sized ones)
    • Note: I used golden delicious but you can use other varieties too
  • Generous 1/2 cup of brown sugar
  • 2 teaspoons of cinnamon
  • 1 teaspoon of allspice
  • Juice from half a lemon (or one squeeze from the lemon juice bottle)
  • 1/2 cup apple cider (or apple juice)
  1. Peel the apples and use a corer to divide into slices.
  2. In a large bowl, combine the apple slices, spices, brown sugar and lemon juice.
  3. Add the apple mixture to a medium size pot. Pour the apple cider over the mixture.
  4. Cook the apples over medium heat until the fruit is cooked through and tender.
  5. If desired, set aside some apple pieces to use as dessert topping. 
  6. Otherwise, use an immersion blender to roughly blend the mixture into an applesauce consistency. 

Thursday, November 13, 2014

Vegetarian Tortilla Soup

It's getting to be that time of year again. The weather is turning cold but not yet bitter cold like what we see in February. Colds and sneezes are going around like crazy and it's just the right sunlight for a hot bowl of soup. Last year I went a little soup-crazy and I make no promises that soup adventures won't happen again.

Apparently this year 'cauliflower' is a buzz word in the food world. I'm not a big fan, opting to mask the cauliflower in other things rather than eating it straight. I highly doubt I will ever make cauliflower soup alone but to try a new soup, I ventured into the spicy world of tortilla soup.

This always makes me think of winter and a family friend who made this for me back when I was a kid. Initially I was concerned about soggy tortillas in my soup but once they're fried, they add a nice crunch. Like most soups, this is pretty low maintenance. The biggest challenge for me was frying the tortillas which admittedly, resulted in some burnt chips.

An onion, garlic pieces and spices are all sweated together before adding diced canned tomatoes and vegetable broth. This is all blended together before adding the 'meat' of the dish which happens to be meatless! Yellow peppers and black beans are the last veggies for this guy. Everything is simmered together until the peppers are cooked.

Topped with the tortillas, cheese, cilantro and avocados, this was a perfect lunch on a crisp November day. Of course, I didn't actually top this with avocados because I ate all of them before I could put them on top of the soup but you get the idea. It had just the right amount of kick for me but if you like extra spicy things, you can add some chopped jalapenos.

This dish is vegetarian friendly and if you use gluten-free tortillas, is also gluten-free! However, dietary restrictions aside, this would also fair well with some shredded chicken or pulled pork. Next time...

Recipe
From Joy the Baker

  • 3 medium tortillas, chopped into bite-sized pieces
  • 3 Tablespoons olive oil
  • 1 medium white onion
  • 2 cloves of garlic
  • 2 teaspoons paprika
  • 1 teaspoon chili powder
  • 1 teaspoon cumin
  • 1/2 teaspoon cayenne pepper
  • 1 can of diced tomatoes (complete with juice)
  • 4 cups (or one container) of vegetable broth
  • 1 can of black beans (drained and rinsed)
  • 1 chopped yellow pepper
  1. Heat the olive oil in a medium pan. Fry the tortilla pieces in two batches. The first batch will take some time to cook, make sure to flip them over. The second batch moves very quickly.
  2. In the same pot, add the chopped onion, minced garlic and spices. Cook the onion until translucent and the ingredients are sweated together. Note: I could never host a cooking show because I always cry when I chop onions.
  3. Add the vegetable broth and diced tomatoes (complete with juice) into the pan. Using an immersion blender, coarsely blend the soup together.
  4. Add the chopped pepper and black beans to the soup. Cover and cook on low heat for about 20 minutes until the pepper are cooked and tender.
  5. Serve hot and top with the tortilla chips. You can also add cilantro, avocado, cheese, radishes etc. to the soup. I recommend only adding the chips when you're ready to eat the soup and not leave them in there overnight or between servings. You want them nice and crispy! 

Monday, November 10, 2014

Spooky Caramel Apples

I must say, this was the busiest Halloween I have had possibly ever. Between work parties and house parties, there were three different costumes going around and an equal number of spooky treats. Cupcakes are an easy go-to for parties because they're single-serve. I try to keep the treats to things people can grab and go with. Like mini-caramel apples. All of the things.

 
A few months ago when Halloween started taking over Pinterest, I saw these dark caramel apples and thought they would be a great Snow White inspired treat. However, they turned out to be quite a challenge. I went apple picking late in October so a lot of apples were picked over but apparently no one likes golden delicious. There was an abundance of golden delicious apples, including several that were nearly bite sized. My issue with caramel apples is they're so hard to start into because you just get your face all sticky trying to take the first bite. But with the smaller version, it seemed perfect for a party treat.


My plan was to make caramel apples pops with Halloween sprinkles coating some of the caramel apples. Everything was going well with the caramel making and the food coloring, I even sampled the caramel and it tasted amazing. However, it was simply sliding off the apples. I tried cooling the caramel for awhile in the fridge which did help but ultimately, I had some sticky slimy caramel apples. Perhaps if I had chilled the apples, that would have worked better. Lessons for next time.

 
They never quite got to that solid state like at the apple orchards but they must have still been good because they were all eaten up! I also managed to spill a fair amount of caramel and sprinkles everywhere. It basically sounded like a rain stick in my living room.

 
Overall a successful spookfest was had by all. And most importantly, IT'S ALMOST CHRISTMAS TIME!!!!!!!!!!!!! Too much too soon? I think not.

Recipe
makes about 18 small caramel apples
  • 2 Tablespoons corn syrup
  • 2 Tablespoons of water
  • 1/2 cup granulated sugar
  • 1/4 cup heavy cream
  •  Pinch of salt
  • 1/2 teaspoon vanilla
  • 2 Tablespoons unsalted butter
  • 2-3 drops black food coloring (or combine red, blue and yellow together)
  1. Wash, dry and de-stem the apples prior to dipping in caramel. Line the clean apples on a baking sheet lined with parchment. Attach lollipop sticks or natural sticks to the top.
  2. In a heat proof, microwavable bowl, combine the water, corn syrup and sugar. Cook in the microwave until the mixture is a deep amber color. You can also do this on the stove.
  3. Once the sugar is darkened, stir in the heavy cream, salt, vanilla and food coloring. Stir until combined and then add the butter until it is melted and smooth.
  4. Allow the caramel to cool slightly. Dip the apples in the caramel one at a time, turning to coat the entire apple. Ideally, the excess will drip off of the apple in about 20 seconds and you can then place it back on the wax paper.
  5. Dip in sprinkles if desired. If the caramel isn't sticking to the apple, trying cooling the caramel longer or chill the apples. 


Thursday, October 30, 2014

Halloween Mac & Cheese

Remember when we were kids and everything was cooler if it was in a fun shape or color? Purple oatmeal, Rugrats mac and cheese, Dunkaroos. I love having fun with my food so I couldn't resist buying Halloween shaped pasta. Spiderwebs, ghosts, pumpkins, they made dinner seem all the more festive and exciting.

 
And what better way to pretend you're still a kid as a grown up but to have grown up mac and cheese? I'm just as happy as the next 5 year old to eat Kraft macaroni but for this pasta, we need some adult cheese to balance it out.

 
Using a very scientific method called 'winging-it', I made a roux as the pasta cooked. The roux was really to add some extra creamy texture to the cheese sauces as there's really far more cheese than butter/flour. The roux is made by combining equal parts butter and flour to make a sort of paste. Milk is added to smooth it out before shredding a whole bunch of cheese. Just when you think you have enough cheese, add some more!

 
Just so I can say that this meal contains a serving of vegetables, I added chopped mushrooms to the mix. You could also add bacon, tomatoes, sausage, really anything you'd like or would enjoy on a pizza.

 
The cheese sauce should be nice and thick, you don't want it to be too liquidy or it won't stick to the pasta. Add more cheese if necessary (always add more cheese). All of the ingredients are combined in the pot of cooked, drained Halloween pasta. Stir it all together and you've got a gooey, delicious and spooky meal!

This can also be applied to things like turkey shaped pasta or dreidel pasta (it exists, my sister's getting it for Hanukkah this year), all the shapes of pasta really.

 
I hope you all have a Happy Halloween!! Stay tuned for some little monster treats...

Recipe
  • 14 oz. of fun pasta (or regular)
  • 2 Tablespoons unsalted butter
  • 2 Tablespoons all-purpose flour
  • 1/2 cup of milk
  • 8 oz. cheddar cheese or adult cheese of choice
  • Dash of paprika (optional)
  • 8 ounces mushrooms, chopped (optional)
  1. In a large pot, bring water to a boil for the pasta. 
  2. Once the water is boiling, add the pasta noodles and cook until tender.
  3. While the pasta cooks, in a skillet or frying pan, melt the butter. Add the flour once the butter is melted and combine to make a paste.
  4. Add the milk to the skillet and mix until smooth.
  5. Reduce the heat to low and grate the cheese directly into the skillet, stirring as needed to help melt the cheese. 
  6. Once all of the cheese is melted, stir to check the consistency. If the sauce is runny, add more cheese until it resembles a thick alfredo sauce.
  7. Add the chopped mushrooms to the sauce and remove from heat.
  8. Drain the pasta once it is done cooking. 
  9. Add the sauce and chopped mushrooms to the pasta and mix until combined. You can also add paprika, salt or pepper if you choose.
  10. Serve hot!